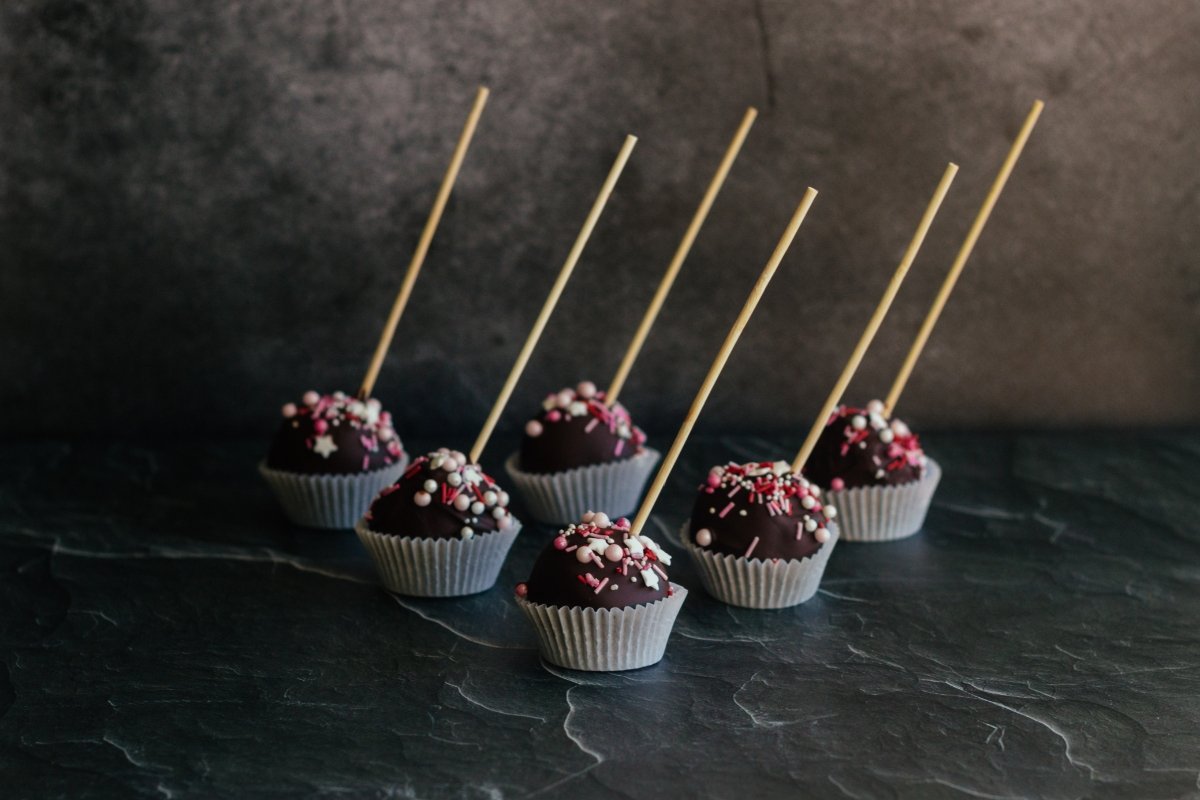
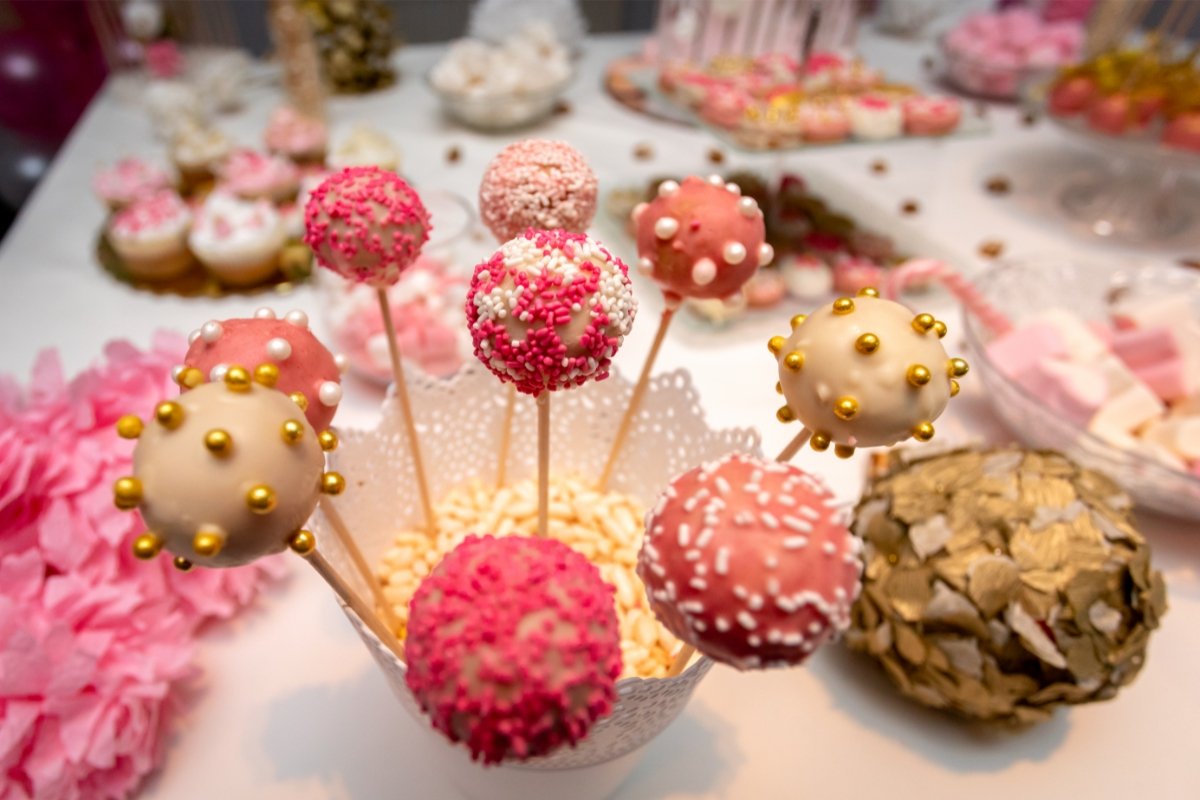
Welcome to the ultimate guide on how to create delightful and irresistible treats with our cake pop recipes. Whether you’re a seasoned baker or trying your hand at making cake pops for the first time, this guide promises to walk you through a simple, yet comprehensive process to make these delightful treats. Cake pops, a popular choice for parties, weddings, and as a fun everyday snack, offer a creative and delicious way to enjoy cake in a bite-sized form. In this blog post, we’ll dive into everything from the basics of making cake pops to decorating them to perfection. Get ready to impress your guests and treat your taste buds to these homemade delights.
History and Evolution of Cake Pops

The journey of cake pops begins with the inventive spirit of bakers looking to repurpose leftover cake. The concept is simple yet ingenious: combine cake crumbs with frosting, form them into balls, and dip them in chocolate or candy coatings. This method not only prevents waste but also creates a new, delightful treat. The exact origin of cake pops is a bit of a sweet mystery, with various bakers and home cooks claiming to have invented them. However, one name stands out in popularizing cake pops: Bakerella, aka Angie Dudley. In 2008, Dudley started experimenting with cake pops and shared her creations on her blog, capturing the imagination of dessert lovers worldwide.
The appeal of cake pops lies in their perfect blend of creativity and convenience. They’re not just about the taste; they’re a canvas for decoration and personalization. As their popularity soared, so did the variations in their design. From simple sprinkles and colors to intricate designs resembling animals, flowers, and holiday themes, cake pops became a form of edible art.
The evolution of cake pops mirrors the broader trends in the culinary world, where personalization and presentation play a significant role in the popularity of a dish. They’ve moved from being a clever way to use leftovers to a sought-after treat for celebrations and corporate events. The rise of social media further catapulted cake pops into the spotlight, with images of creatively decorated pops spreading like wildfire across Pinterest, Instagram, and Facebook.
Today, cake pops are a staple in bakeries and cafes, and their popularity shows no signs of waning. They have become a beloved treat for all ages, offering a perfect bite-sized indulgence that’s as fun to make as it is to eat. The journey of cake pops from a simple kitchen experiment to a global dessert phenomenon is a testament to the power of creativity in the culinary world.
With the historical context in place, let’s explore why cake pops have captured the hearts (and taste buds) of so many.
Why Cake Pops Are Popular
Cake pops hold a unique place in the world of desserts for several reasons, each contributing to their widespread popularity. Here’s a closer look at why these tiny treats have become a big hit:
1. Versatility and Customization: Cake pops are incredibly versatile. They can be made from any cake flavor and paired with various types of coatings and decorations. This adaptability means they can be customized for any occasion, from weddings and birthdays to holidays and corporate events.
2. Portion Control: For those who love sweets but are mindful of portion sizes, cake pops offer a perfect solution. Each pop provides a satisfying taste of cake without the commitment to a large slice. This portion control makes cake pops an appealing choice for dessert tables and as a guilt-free treat.
3. Convenience and Portability: The lollipop stick makes cake pops easy to handle, serve, and enjoy without the need for plates or utensils. This convenience is especially appealing at events where guests are mingling and moving around.
4. Eye-Catching Presentation: Cake pops can be decorated to suit any theme or color scheme, making them a visually appealing addition to any dessert spread. Their ability to be customized with intricate designs also makes them a favorite for themed parties and special occasions.
5. Fun to Make and Share: Making cake pops is an enjoyable activity for bakers of all skill levels, including children. The process of rolling, dipping, and decorating encourages creativity and can be a fun group activity. Additionally, their size and presentation make cake pops ideal gifts or party favors.
6. Social Media Appeal: The photogenic nature of cake pops has contributed to their popularity on social media platforms. They are often featured in posts and tutorials, inspiring others to try making them at home or seek them out at bakeries.
7. Economic Efficiency: For professional bakers and home cooks alike, cake pops offer a smart way to utilize leftover cake scraps, ensuring that nothing goes to waste. This efficiency appeals to those who value sustainability and creativity in the kitchen.
The combination of these factors has helped cake pops to not only emerge as a popular dessert choice but also to maintain their status as a beloved treat across various demographics and occasions.
Basic Ingredients and Tools Needed
To embark on your cake pop making journey, having the right ingredients and tools is crucial. This section outlines everything you’ll need to create these delightful treats from scratch.

Ingredients:
1. Cake: The base of your cake pop. You can use any cake flavor you like—vanilla, chocolate, red velvet, etc. Either bake a cake from scratch using your favorite recipe or use a boxed cake mix for convenience.
2. Frosting: This acts as a binder for the cake crumbs. You can use homemade buttercream, cream cheese frosting, or even store-bought frosting. The flavor can complement or contrast with your cake, depending on your preference.
3. Candy Melts or Chocolate: For the outer shell. Candy melts come in various colors and flavors, offering flexibility in design. Alternatively, you can use tempered chocolate for a classic taste.
4. Vegetable Shortening or Coconut Oil(optional): A small amount can be mixed with the candy melts or chocolate to achieve a smoother consistency for dipping.
Tools:
1. Large Bowl: For crumbling the cake and mixing it with frosting.
2. Hand Mixer or Stand Mixer (optional): While not strictly necessary, a mixer can make the process of combining cake crumbs and frosting easier and more uniform.
3. Cookie Scoop or Spoon: To scoop consistent amounts of the cake mixture for rolling.
4. Wax Paper or Silicone Mat: Provides a non-stick surface for assembling and decorating your cake pops.
5. Cake Pop Sticks: These lollipop sticks serve as the handle for your cake pops, making them easy to dip and decorate.
6. Styrofoam Block or Cake Pop Stand: To hold the cake pops upright while they set, preventing smudging or flattening of the chocolate shell.
7. Microwave-Safe Bowl: For melting candy melts or chocolate.
8. Spatula or Spoon: For mixing the candy melts and ensuring a smooth consistency.
With these ingredients and tools, you’re well-equipped to start making cake pops. Remember, the beauty of cake pops lies in their versatility, so feel free to experiment with different flavors, colors, and decorations to suit your taste and occasion.
Step-by-Step Recipe
Creating cake pops involves several key steps, each contributing to the final, delightful treat. Follow this detailed guide to make your own cake pops from scratch.
Preparation of the Cake Base
Ingredients:
– 1 box cake mix (any flavor) or your favorite cake recipe
– Ingredients required by the cake mix or recipe (typically water, oil, and eggs)
Instructions:
1. Bake the Cake: Preheat your oven according to the cake mix or recipe instructions. Prepare the cake batter as directed and pour it into a greased baking pan. Bake until a toothpick inserted into the center comes out clean. Allow the cake to cool completely.
2. Crumble the Cake: Once cooled, crumble the cake into fine crumbs using your hands or a fork, ensuring there are no large pieces. This can be done in a large bowl to minimize mess.
3. Mix in Frosting: Add frosting to the crumbled cake, starting with a small amount. Use a hand mixer or your hands to combine the frosting with the cake crumbs until the mixture can hold a ball shape. Be careful not to add too much frosting, which can make the cake pops too moist.
Making the Frosting
Ingredients:
– 1/2 cup unsalted butter, softened
– 1 1/2 cups powdered sugar
– 2 tablespoons milk or cream
– 1 teaspoon vanilla extract (optional)
Instructions:
1. Combine Ingredients: In a medium bowl, beat the butter until smooth. Gradually add powdered sugar, milk, and vanilla extract, and continue to beat until the frosting is smooth and spreadable.
2. Adjust Consistency: If the frosting is too thick, add a bit more milk. If it’s too thin, add more powdered sugar until the desired consistency is reached.
Forming and Decorating the Cake Pops
Ingredients:
– Prepared cake and frosting mixture
– Candy melts or chocolate
– Vegetable shortening or coconut oil (optional)
– Sprinkles, edible glitter, or other decorations
Instructions:
1. Form the Cake Balls: Using a cookie scoop or spoon, portion the cake mixture and roll it into smooth, even balls. Place the balls on a wax paper-lined baking sheet and refrigerate for about 20 minutes to firm up.
2. Melt the Coating: Melt the candy melts or chocolate in a microwave-safe bowl, stirring every 30 seconds until smooth. If using, mix in a small amount of vegetable shortening or coconut oil to thin the coating.
3. Dip the Sticks: Dip the tip of each cake pop stick into the melted coating, then insert it about halfway into a cake ball. This helps secure the stick.
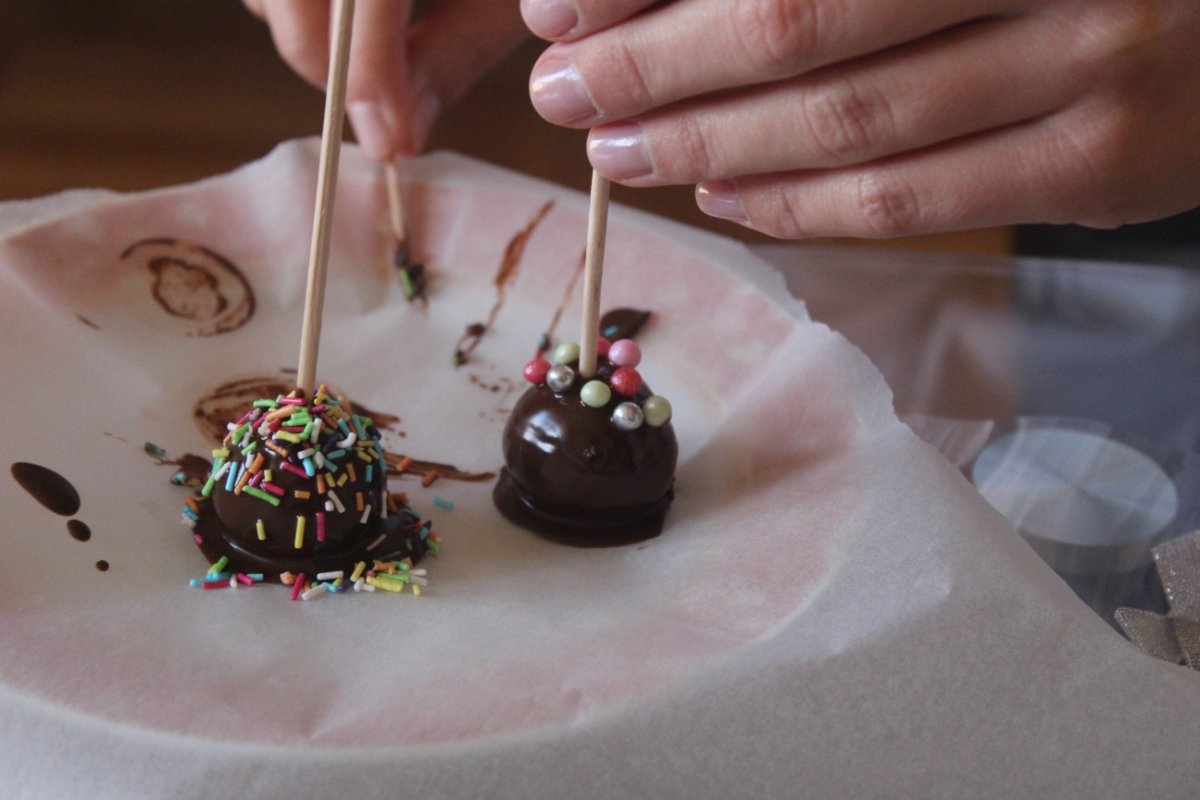
4. Dip and Decorate: Dip each cake ball into the coating, gently tapping off any excess. Decorate with sprinkles or other decorations before the coating sets. Place the cake pops upright in a Styrofoam block or cake pop stand to set completely.
These steps will guide you through creating your own cake pops, from baking the cake base to decorating your finished treats. Remember, making cake pops is as much about creativity as it is about following a recipe. Feel free to experiment with different flavors, colors, and decorations to make your cake pops uniquely yours.
Tips and Tricks for Perfect Cake Pops
Creating the perfect cake pop is an art that comes with practice and patience. Here are some expert tips and tricks to help you achieve flawless results every time:
1. Cake Texture: Ensure your cake is fully cooled before crumbling. If the cake is too warm, it can lead to a mushy texture when mixed with frosting. For best results, some bakers even recommend chilling the cake slightly.
2. Frosting Ratio: Finding the right balance of cake to frosting is crucial. Too much frosting will make your cake pops too wet and difficult to shape; too little, and they won’t hold together. Start with a small amount of frosting and gradually add more until the mixture is moist enough to form into balls.
3. Chill Before Dipping: Chilling the formed cake balls is essential to prevent them from falling apart when dipped into the melted chocolate or candy melts. Refrigerate them until they are firm but not too hard, typically around 20-30 minutes.
4. Smooth Coating: To achieve a smooth coating, ensure your candy melts or chocolate are melted thoroughly and kept at a consistent temperature. Adding a bit of vegetable shortening or coconut oil can help achieve a smoother consistency.
5. Avoid Cracks: To prevent the coating from cracking, avoid drastic temperature changes. Make sure the cake balls are not too cold when dipping, as the contrast with the warm coating can cause cracks.
6. Decorating: Apply any decorations like sprinkles or edible glitter while the coating is still wet. This ensures they will stick to the surface. For more intricate designs, wait until the base layer has set before adding additional layers or details.
7. Storing Cake Pops: If not serving immediately, store cake pops in an airtight container in the refrigerator. They can last up to a week, making them a great make-ahead treat for events.
8. Practice: Don’t get discouraged if your first batch of cake pops doesn’t turn out perfectly. Like any baking project, making cake pops requires practice. Each batch will teach you more about what works best for your specific conditions and preferences.
By keeping these tips in mind, you’ll be well on your way to creating beautiful and delicious cake pops that are sure to impress.
Customization Ideas

One of the joys of making cake pops is the endless possibilities for customization. Whether you’re catering to specific dietary needs, celebrating a special occasion, or simply experimenting with flavors and designs, here are some ideas to inspire your cake pop creations:
For Different Occasions:
– Birthdays: Decorate with bright colors, edible glitter, and use fondant to create numbers or letters.
– Weddings: Opt for elegant designs with white and gold candy melts, adding pearls or lace patterns.
– Holidays: Get festive with themed decorations – orange and black for Halloween, red and green for Christmas, pastels for Easter, etc.
– Baby Showers: Use soft blues, pinks, or gender-neutral colors, decorating with baby-related motifs like booties or rattles.
Dietary Adaptations:
– Gluten–Free: Start with a gluten-free cake base and ensure all other ingredients, including candy melts, are gluten-free.
– Vegan: Use a vegan cake recipe and vegan frosting. Look for dairy-free chocolate or candy melts for coating.
-Low–Sugar: Opt for a low-sugar cake recipe and use dark chocolate with a higher cocoa content for the coating to reduce overall sugar.
Flavor Combinations:
– Classic Chocolate-Vanilla: A vanilla cake base with chocolate frosting, dipped in milk chocolate.
– Red Velvet-Cream Cheese: Red velvet cake mixed with cream cheese frosting, dipped in white chocolate.
– Lemon-Coconut: Lemon cake with a hint of coconut in the frosting, dipped in white chocolate and sprinkled with shredded coconut.
Design Ideas:
– Characters: Use fondant, edible markers, and various candies to create cake pops resembling popular cartoon or movie characters.
– Flowers: Mold the cake pops into flower shapes, using colored coatings and piped details to create a bouquet of edible flowers.
– Sports: Create balls resembling different sports balls, like basketballs, footballs, or soccer balls, using appropriate colors and designs.
Packaging and Presentation:
– Gift Boxes: Arrange decorated cake pops in a gift box with a clear window, adding a ribbon for a finishing touch – perfect for gifting.
– Bouquets: Stick the cake pops into a Styrofoam block inside a decorative pot, arranging them like a bouquet of flowers.
– Party Favors: Individually wrap cake pops in cellophane and tie them with a ribbon, including a thank-you note or event detail for guests.
These ideas are just the starting point. The real magic happens when you let your creativity flow, experimenting with different combinations and designs to create cake pops that are uniquely yours.
Conclusion
As we wrap up this comprehensive guide on making cake pops, remember that the key to perfect cake pops is patience, practice, and creativity. Whether you’re a seasoned baker or a newcomer to the world of cake decorating, cake pops offer a fun and versatile canvas for your culinary artistry. Don’t be afraid to experiment with flavors, colors, and decorations to make your cake pops stand out. With these tips, tricks, and ideas, you’re well-equipped to delight friends, family, and guests with your homemade cake pops at your next event or gathering. Happy baking, and enjoy the delicious rewards of your efforts!

