
The art of making a homemade chocolate torte is a journey through time, a dance with decadence, and an ode to the culinary prowess that baking embodies. This elegant dessert, with its rich history rooted in the grand kitchens of Europe, has been a symbol of celebration, a centerpiece of gatherings, and a testament to the versatility of chocolate in its most luxurious form. The chocolate torte, distinct from its cake counterparts by being flourless or nearly so, offers a dense, fudgy heart and a sophisticated profile that appeals to the palates of dessert aficionados worldwide.
Its importance spans various cuisines, having been adapted and perfected by bakers and chefs to suit the tastes and textures favored by different cultures. Yet, at its core, the chocolate torte remains a beloved treat for its intense flavor and velvety texture. Whether served at a high-end restaurant or a cozy home kitchen, its presence on the table signifies something special.
In this comprehensive guide, we’ll embark on a culinary adventure to explore the world of homemade chocolate torte. From understanding the pivotal role of chocolate to mastering the essential techniques for a perfect bake, this blog post is designed to enlighten both novice bakers and seasoned pros. We’ll delve into the nuances of selecting the right ingredients, step-by-step instructions for creating your masterpiece, decoration tips to impress, and troubleshooting advice to ensure your chocolate torte is nothing short of spectacular. So, preheat your ovens, and let’s get started on this delicious journey.
Understanding Chocolate: Choosing the Best Type for Your Torte
Diving into the world of chocolate is akin to exploring a vast treasure trove, each variety holding its own unique flavors, textures, and secrets that can transform your baking. The choice of chocolate not only influences the taste but also the structure and richness of your torte. Let’s unwrap the essentials of chocolate as we prepare to craft a dessert that’s as delightful to the palate as it is to the eye.
The Varieties of Chocolate: Choosing Your Main Ingredient
Dark Chocolate: The Purest Form of Decadence
Dark chocolate, characterized by its high cocoa content, is the quintessential backbone for a chocolate torte that aims to impress with its depth and intensity. Opt for a variety containing 60% to 70% cocoa for that perfect balance of sweetness and bitterness. This type of chocolate melts beautifully, embedding your torte with a rich, velvety texture and a robust flavor profile.
Milk Chocolate: A Sweeter, Creamier Alternative
For those who prefer a lighter, sweeter torte, milk chocolate is your go-to. It introduces a creamy texture and a milder chocolate taste, making it an excellent choice for a torte that aims to be rich yet not overwhelming. Milk chocolate melds seamlessly into the batter, offering a silkier, less dense outcome.
White Chocolate: A Delicate Whisper of Cocoa
White chocolate, devoid of cocoa solids, offers a sweet, buttery flavor with hints of vanilla. It’s an unconventional choice for a chocolate torte but can create an exquisite, subtle dessert when paired with the right ingredients. It’s perfect for bakers looking to experiment with flavors and textures.
Selecting Quality Chocolate: Your Key to a Superior Torte
The secret to a memorable chocolate torte lies in the quality of chocolate you choose. High-quality chocolate, often labeled as “couverture,” contains a higher percentage of cocoa butter, contributing to a smoother melt and a richer flavor. Look for chocolate with a short ingredient list — cocoa solids, cocoa butter, and sugar should be at the forefront, with minimal to no additives. Trust your senses; good chocolate should smell invitingly of cocoa and break with a clean, sharp snap.
Why Chocolate Quality Matters
Using premium chocolate in your torte is not just about luxury; it’s about elevating the entire eating experience. Quality chocolate ensures a smooth, homogeneous melt, eliminating the risk of a grainy texture. It also impacts the flavor depth of your torte, with finer chocolates offering more complex and lingering tastes. Remember, the chocolate you choose is the star of your dessert, and its quality will shine through in every bite.
Essential Ingredients and Tools for Your Chocolate Torte
Crafting a homemade chocolate torte that mesmerizes with its flavors and textures begins with assembling the right cast of ingredients and tools. This section ensures you have everything at your fingertips for a smooth baking process, allowing your creativity and passion for chocolate to shine through.
Ingredients: The Foundation of Flavor
Cocoa Powder: Choose high-quality unsweetened cocoa powder for an intense chocolatey backbone. It adds depth and complexity to your torte without additional sweetness.
Butter: The key to a moist, rich torte, unsalted butter enhances flavor and lends a luxurious texture. Ensure it’s at room temperature for seamless blending.
Sugar: Fine granulated sugar dissolves easily, contributing to the torte’s sweet balance. Adjust the amount based on the sweetness of your chocolate.
Eggs: Large, fresh eggs bind the mixture, adding structure and richness. They should be at room temperature to incorporate air and volume easily.
Vanilla Extract: A splash of pure vanilla extract can elevate the chocolate flavor, adding a layer of aroma and complexity.
Salt: A pinch of salt enhances the overall flavor profile, sharpening the chocolate taste and balancing the sweetness.
Optional Add-ins: Consider incorporating finely chopped nuts, orange zest, or a dash of espresso powder to introduce subtle nuances to your torte.
Tools: Crafting Your Masterpiece
Springform Pan: A must-have for any torte, ensuring easy removal without damaging your delicate dessert.
Mixing Bowls: Have a variety of sizes on hand for separating ingredients and easing the mixing process.
Electric Mixer: Essential for whipping eggs and sugar to the right consistency, adding volume and lightness to your torte.
Sieve: Sifting dry ingredients like cocoa powder and sugar prevents lumps and ensures a smooth batter.
Rubber Spatula: A flexible spatula is invaluable for folding ingredients gently, preserving the airiness of your mixture.
Baking Paper: Lining your pan with baking paper ensures your torte releases smoothly, without sticking.
Cooling Rack: Allows air to circulate around the baked torte, cooling it evenly and preventing sogginess.
Sharp Knife: A must-have for creating clean, precise slices, showcasing the dense, rich texture of your torte.
Ingredient and Tool Selection Tips
- Ingredient Quality: Opt for the best ingredients within your budget. The quality of each component directly impacts the final taste and texture of your torte.
- Preparation: Measure and prepare your ingredients before starting. This “mise en place” ensures a streamlined, stress-free baking process.
- Tool Care: Ensure your tools are in good condition. A well-maintained electric mixer and sharp knives make a significant difference in ease and quality of baking.
Crafting the Classic Chocolate Torte: A Step-by-Step Guide
Embarking on the creation of a chocolate torte is a culinary adventure that promises a rewarding finish. With the right ingredients, tools, and a dash of patience, you’re set to craft a dessert that’s bound to be the talk of any table it graces. This section will guide you through each step, ensuring your journey from mixing bowl to dining table is as smooth as the torte you’re about to create.
Gathering Your Ingredients
For this classic chocolate torte, you will need:
- 200g high-quality dark chocolate (70% cocoa): The star of the show, providing a rich and intense chocolate flavor.
- 200g unsalted butter: Adds silkiness and depth.
- 4 large eggs: The binding element, giving structure to your torte.
- 1 cup (200g) sugar: Balances the bitterness of the chocolate.
- 1 tsp vanilla extract: Enhances the chocolate flavor.
- 1/4 cup (30g) almond flour (optional): Offers a subtle nuttiness and a tender crumb, making the torte gluten-free.
- Pinch of salt: Enhances all flavors.
Essential Tools and Equipment
- 8-inch (20cm) springform pan: Ideal for easy torte removal.
- Double boiler or microwave: For melting chocolate and butter.
- Electric mixer: Ensures a well-aerated batter.
- Sieve: For ensuring a smooth flour incorporation.
- Baking paper: Prevents sticking.
- Wire rack: For cooling.
The Method to the Magic
Preheat and Prepare: Start by preheating your oven to 350°F (175°C). Line the bottom of your springform pan with baking paper and lightly grease the sides.
Melt with Care: Chop the chocolate and butter into small pieces and melt them together. You can use a double boiler for even heating or a microwave in short bursts, stirring between each until smooth. Let the mixture cool slightly.
Whisk to Perfection: Separate the eggs, placing the whites in one bowl and the yolks in another. Whip the egg whites with half the sugar until stiff peaks form. In another bowl, beat the yolks with the remaining sugar and vanilla extract until thick and pale.
Combine with Finesse: Fold the cooled chocolate mixture into the yolk mixture. If using almond flour, sift it in now, along with a pinch of salt. Gently fold in the egg whites in thirds, being careful not to deflate the mixture.
Bake to Delight: Pour the batter into the prepared pan and smooth the top. Bake for 25-30 minutes or until the torte is set but still slightly wobbly in the center. Cool in the pan for 10 minutes, then transfer to a wire rack to cool completely.
Serve with Flair: Dust with powdered sugar or top with whipped cream and berries for an extra touch of elegance.
Variations for Dietary Restrictions
- Gluten-Free: Ensure your almond flour is certified gluten-free. The base recipe is naturally gluten-free.
- Vegan: Substitute eggs with flax eggs (1 flax egg = 1 tbsp ground flaxseed + 3 tbsp water), use dairy-free chocolate and butter.
Decoration and Presentation Ideas for Your Chocolate Torte
Once your chocolate torte has cooled and is ready to serve, the next step is to transform it into a show-stopping masterpiece. The beauty of a chocolate torte lies not only in its taste but also in its presentation. With a few simple yet elegant decoration techniques, you can elevate your torte from a homemade delight to a professional-looking dessert that captures both the eye and the palate.
Embrace the Elegance of Simplicity
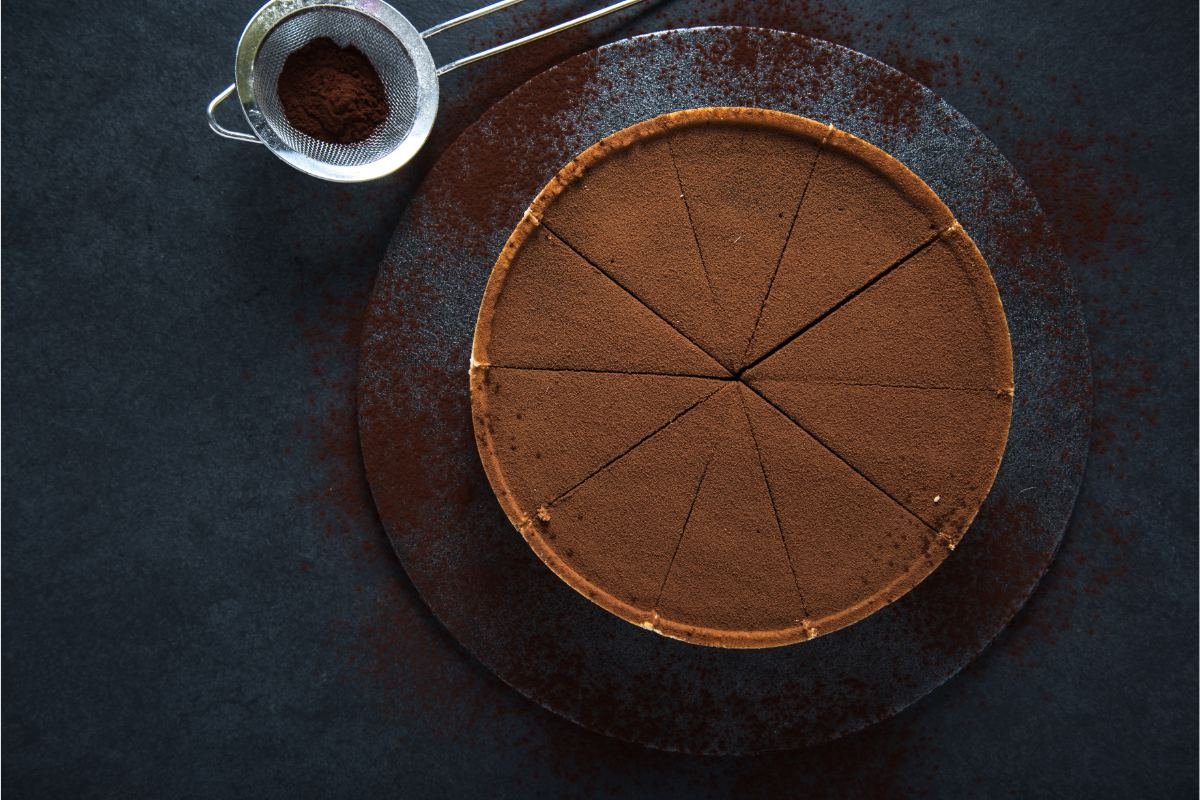
Dust with Powdered Sugar: A fine dusting of powdered sugar can give your torte an instant lift, adding a touch of elegance with minimal effort. Use a sieve for an even, light dusting, and consider placing a lace doily or a patterned stencil on the torte before dusting for a decorative pattern.
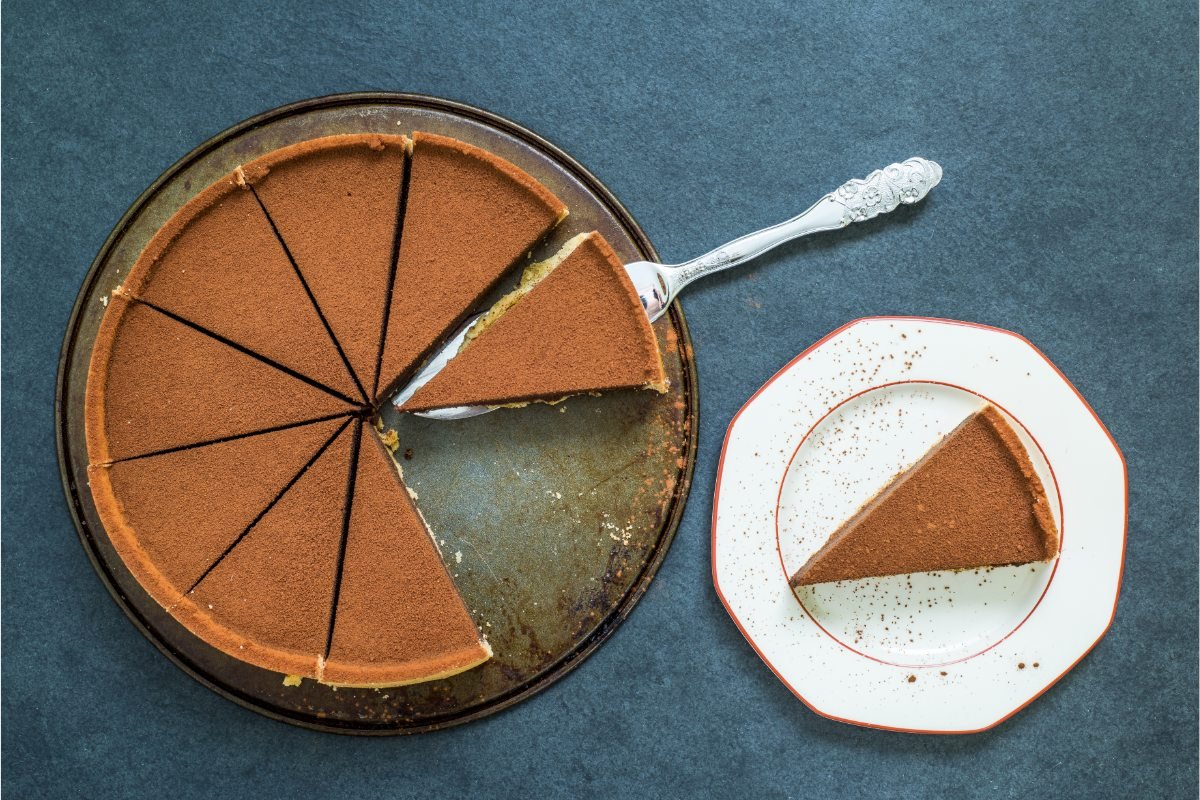
Cocoa Powder or Chocolate Shavings: For a more intense chocolate experience, dust your torte with unsweetened cocoa powder, or sprinkle with chocolate shavings. Use a vegetable peeler to create delicate shavings from a bar of chocolate.
Add a Splash of Color
Fresh Berries: Top your torte with a crown of fresh berries for a burst of color and a hint of tartness that complements the deep chocolate flavor. Strawberries, raspberries, blueberries, or a mix of your favorites not only look stunning but also add a fresh, juicy texture.
Edible Flowers: For a truly eye-catching presentation, decorate your torte with edible flowers. Violets, roses, and pansies are beautiful and safe to eat. Ensure they’re free from pesticides and rinse gently before use.
Incorporate Texture and Flavor
Whipped Cream or Mascarpone: A dollop of lightly whipped cream or a quenelle of mascarpone cheese on the side of each slice adds a creamy texture and a slight tang, balancing the richness of the torte.
Nut Toppings: Toasted and chopped nuts such as almonds, hazelnuts, or pecans add a delightful crunch and nutty flavor. Sprinkle them around the edges or over the top for a rustic look.
Serve with Style
Slicing Techniques: Use a hot, dry knife to slice your torte, wiping the blade between cuts for clean, sharp edges. Consider slightly warming each slice before serving to intensify the flavors and textures.
Plating: Serve each slice on a simple, elegant plate. A drizzle of raspberry coulis or a pool of crème anglaise can add an extra level of sophistication and flavor contrast.
Pairing Suggestions: Elevate the entire dining experience by pairing your chocolate torte with a dessert wine, a cup of espresso, or a glass of aged port. These beverages complement the richness of the chocolate and make each bite even more enjoyable.
Troubleshooting Common Chocolate Torte Problems
Even the most experienced bakers encounter hiccups now and then. Chocolate torte, with its dense, rich texture, can present unique challenges. But fear not! With a few expert tips, you can easily navigate these common issues, ensuring your torte turns out impeccably every time.
Torte Too Dry
Moisture is Key: A dry torte often results from overbaking. To avoid this, start checking your torte for doneness a few minutes before the recipe’s suggested baking time. Look for a set edge and a slightly wobbly center. Remember, the torte will continue to set as it cools.
Add Syrup: If you find your torte is dry, brush it lightly with a simple syrup (equal parts sugar and water, heated until the sugar dissolves). This can reintroduce moisture and add a slight sweetness.
Torte Cracks on Top
Gentle Temperature: Cracks usually form when the torte is baking at too high a temperature, causing the outside to set too quickly while the inside is still expanding. Bake your torte at the temperature recommended in the recipe, and consider using an oven thermometer to ensure accuracy.
Cool Gradually: Let the torte cool gradually in the oven with the door slightly ajar. This slower cooling process helps prevent sudden temperature changes that can lead to cracking.
Uneven Baking
Oven Positioning: Place your torte in the center of the oven where the temperature is most consistent. Avoid the top or bottom racks unless specified by the recipe, as these areas can cause uneven baking.
Rotate Halfway Through: If your oven has hot spots, rotate your torte 180 degrees halfway through the baking time to encourage even cooking.
Torte is Too Dense or Heavy
Whisk Well: The key to a light torte lies in the eggs. Ensure you whisk the egg whites to stiff peaks and fold them gently into the mixture to retain as much air as possible. Overmixing can deflate the batter, leading to a denser torte.
Check Your Ingredients: Ensure your ingredients, especially baking powder or soda if used, are fresh. Expired leavening agents can fail to aerate the batter properly.
Torte Falls Apart When Cutting
Chill Before Cutting: If your torte is crumbling when you try to slice it, chilling it in the refrigerator for a few hours can help it set firmly. Use a sharp, thin-bladed knife, warming it under hot water and drying it before each cut for clean slices.
Let it Set: Patience is a virtue with chocolate torte. Allow it to cool completely in the pan before attempting to remove or cut it. This resting period helps the torte solidify and makes handling much easier.
Advanced Techniques for Elevating Your Chocolate Torte
For those ready to take their chocolate torte to the next level, incorporating advanced baking techniques can transform a simple dessert into a culinary masterpiece. From crafting the perfect ganache to adding unique flavors and textures, these tips will help you enhance your torte, impressing even the most discerning palates.
Mastering the Art of Ganache
Creating Silky Smooth Ganache: Ganache, a luxurious blend of chocolate and cream, can serve as both a filling and a topping for your torte. Heat the cream until it’s just about to boil, then pour it over finely chopped chocolate. Let it sit for a minute before stirring; this patience rewards you with a smoother ganache. For a richer texture, add a knob of butter as the mixture cools.
Flavor Infusions: Elevate your ganache by infusing the cream with flavors like orange zest, mint, or even a splash of rum or espresso. Strain the infused cream before mixing it with chocolate to ensure a smooth finish.
Incorporating Unique Flavors and Textures
Spices and Herbs: Introduce depth to your torte with ground spices such as cinnamon, cardamom, or chili powder for a kick. Fresh herbs, like finely chopped mint or basil, can offer a refreshing twist.
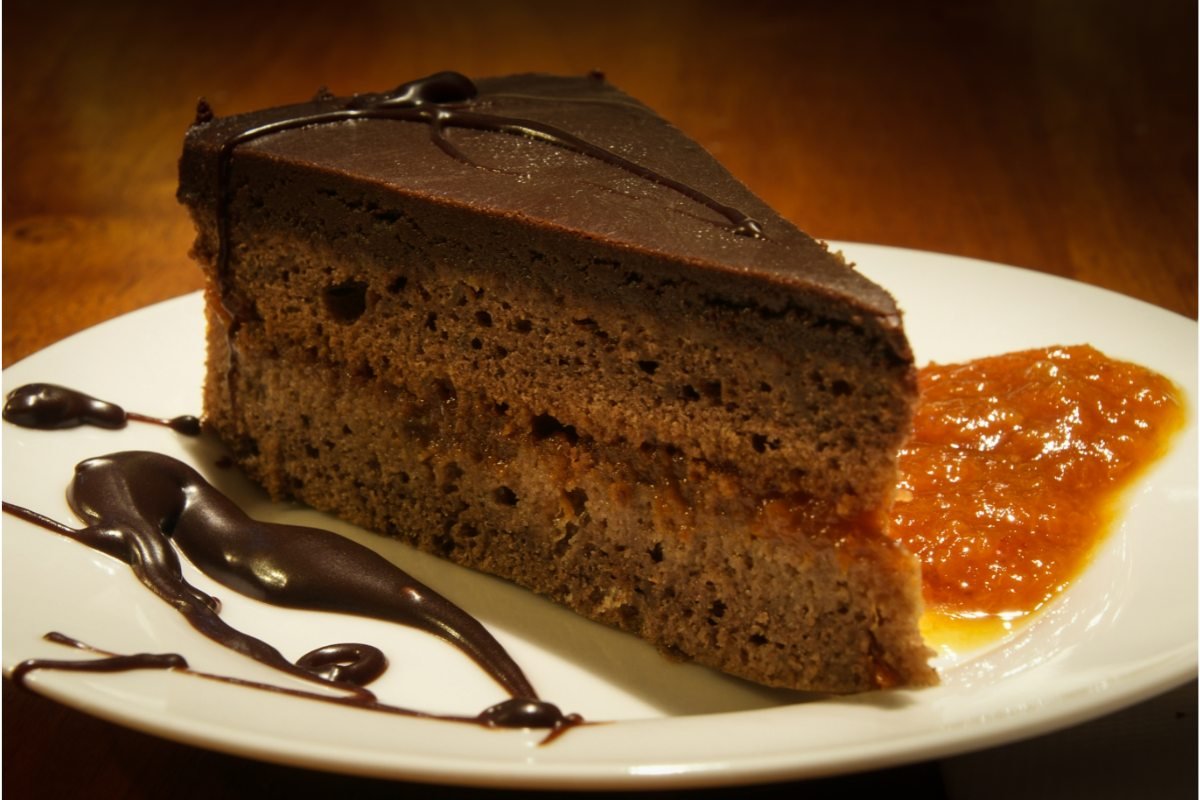
Fruit Layers: Between layers of your torte, consider adding a thin spread of raspberry or apricot jam, or even a layer of fresh berries for a tart contrast to the rich chocolate.
Nutty Crunch: For a satisfying texture, sprinkle toasted, chopped nuts into the batter before baking, or layer them in the middle for a crunchy surprise.
Techniques for a Show-Stopping Finish
Chocolate Curls and Decorations: Melt and temper additional chocolate, spread it thinly on a surface, and use a scraper to form curls or shards. These can be artfully arranged atop your torte for both beauty and flavor.
Mirror Glaze: For the ambitious baker, a mirror glaze provides a stunning, glossy finish that reflects like a mirror. It requires precise temperature control and timing but rewards you with a breathtakingly sleek appearance.
Textural Contrast: Experiment with adding a layer of crispy feuilletine flakes or crushed cookies between the torte and its ganache topping for an unexpected crunch.
Serve With Creativity
Deconstructed Presentation: For a modern twist, consider serving your torte in a deconstructed form. Present elements of the torte separately on the plate, allowing guests to explore the flavors and textures individually.
Pair with Homemade Ice Cream: Complement the dense, rich chocolate of the torte with a scoop of homemade vanilla bean or salted caramel ice cream, offering a delightful temperature and flavor contrast.
Conclusion: The Journey of Homemade Chocolate Torte Mastery
As we wrap up our comprehensive journey through the art of making a homemade chocolate torte, it’s clear that this elegant dessert is much more than just a combination of chocolate, butter, and eggs. It’s a canvas for creativity, a medium for mastering baking techniques, and ultimately, a way to bring joy and indulgence to any table.
Embrace the Adventure
Making a chocolate torte from scratch is an adventure in the world of baking that rewards patience, precision, and passion. From selecting the finest ingredients to mastering the bake and embracing the decoration, each step is a building block towards creating something truly special.
Celebrate Your Mastery
By now, you’ve armed yourself with the knowledge to tackle this classic dessert, equipped with techniques ranging from the basic to the advanced. Whether it’s achieving the perfect ganache or experimenting with unique flavor infusions, your skills are what transform simple ingredients into a masterpiece.
Continue Your Culinary Exploration
The end of this guide is just the beginning of your culinary exploration. Every chocolate torte you bake is an opportunity to refine your techniques, experiment with new ideas, and, most importantly, share the fruits of your labor with friends and family. Celebrate each success and learn from every challenge.
For more inspiration and to discover a myriad of other delightful recipes that can complement your newfound torte expertise, be sure to visit recipeszap.com. This treasure trove of culinary ideas is the perfect next step in your baking journey, offering everything from simple weeknight dinners to extravagant holiday feasts.
Parting Words
As we part ways in this guide, remember that the journey to becoming a master torte baker is as rich and rewarding as the chocolate torte itself. The real secret ingredient? It’s the love and care you put into each step of the process, from the heart to the oven, and finally, to the table. Keep baking, keep experimenting, and most importantly, keep enjoying the delicious rewards of your efforts.
Thank you for joining me on this delicious adventure. May your kitchen be filled with the aroma of chocolate, the warmth of the oven, and the laughter of shared culinary creations. Here’s to your next magnificent chocolate torte, and many more to come. Happy baking!
FAQ Section: Mastering the Chocolate Torte
In the realm of baking, questions are as common as flour and sugar. This FAQ section aims to address some of the most common queries you might have as you embark on or continue your journey of making the perfect homemade chocolate torte. Let’s dive into the answers to help you bake with confidence and creativity.
Can I Use Regular Flour Instead of Almond Flour?
Substituting Flours: Yes, you can use regular all-purpose flour in place of almond flour. However, keep in mind that this will change the torte from being gluten-free to containing gluten. Start with a lesser amount, as all-purpose flour has a different absorption rate. For a denser, fudgier torte, almond flour is preferred for its moisture-retaining properties and subtle nutty flavor.
How Do I Store Leftover Chocolate Torte?
Optimal Storage: Store your chocolate torte in an airtight container to keep it from drying out. It can be kept at room temperature for a day or two, but for longer storage, refrigerate it. The torte actually tastes even better the next day, as this allows the flavors to meld together more fully. For a chilled torte, let it come to room temperature before serving to enhance its flavor and texture.
Can the Torte Be Made in Advance?
Preparing Ahead: Absolutely! Chocolate torte is an excellent dessert for making in advance. Once cooled, wrap it well in plastic wrap and refrigerate. In fact, letting the torte sit for a day can improve its texture and flavor. If you’re preparing for an event, you can also freeze the torte for up to a month. Thaw it overnight in the refrigerator before serving.
Is It Possible to Make a Vegan Chocolate Torte?
Vegan Variations: Yes, making a vegan chocolate torte is entirely possible and can be just as delicious. Use high-quality dairy-free chocolate and substitute the butter with a plant-based alternative. For the eggs, use a vegan egg substitute, such as flax eggs or commercially available vegan egg replacers, which are designed to mimic the binding properties of eggs in baking.
Why Is My Chocolate Torte Not Rising?
Understanding Torte Texture: Traditional chocolate torte is meant to be dense and fudgy rather than light and airy, so it doesn’t rise much during baking. If you’re looking for a bit of lift, ensure that you’re whisking the egg whites to stiff peaks and folding them gently into the batter. Avoid overmixing to keep as much air in the batter as possible.
Can I Add Alcohol to My Torte for Extra Flavor?
Infusing with Alcohol: Yes, adding a splash of your favorite liquor can introduce an exciting flavor dimension to your chocolate torte. Consider liqueurs such as Grand Marnier for a hint of orange, Amaretto for a nutty depth, or even a bourbon for a smoky richness. Mix the alcohol into your melted chocolate or brush it lightly over the baked torte for an adult twist.