Essential Ingredients for Red Velvet Brownies
Crafting the perfect red velvet brownie involves a symphony of ingredients, each playing a critical role in achieving the desired taste, texture, and color. Let’s explore these essential components, understanding their purpose and the magic they bring to the mix.
Cocoa Powder: The Flavor Foundation
Natural unsweetened cocoa powder is the backbone of red velvet’s distinct taste. Unlike its counterpart used in many chocolate desserts, natural cocoa provides a deeper, more acidic flavor profile, which is key to achieving the authentic red velvet taste. This ingredient doesn’t just contribute to the flavor; it also reacts with the acidic components to enhance the brownie’s classic red hue. For the best results, opt for high-quality cocoa powder to ensure your brownies have a rich, chocolaty base without overpowering sweetness.
Buttermilk: The Secret to Moisture
Buttermilk is indispensable in red velvet brownies, adding a subtle tanginess while ensuring the batter remains moist and tender. Its acidity reacts with the baking soda, creating carbon dioxide bubbles that help the brownies rise and maintain a light, cake-like texture. If buttermilk isn’t readily available, you can create a substitute by adding a tablespoon of lemon juice or vinegar to a cup of milk and letting it sit for a few minutes until it slightly curdles.
Vinegar: Enhancing the Red Color
Vinegar, another acidic ingredient, plays a pivotal role in bringing out the vibrant red color of the brownies. It intensifies the reaction with the cocoa powder, making the red more pronounced. Beyond its role in aesthetics, vinegar also works with buttermilk to tenderize the batter, ensuring your brownies are soft and moist. White vinegar is typically used for its neutral flavor, but apple cider vinegar can also be a suitable alternative.
Red Food Coloring: Achieving the Signature Hue
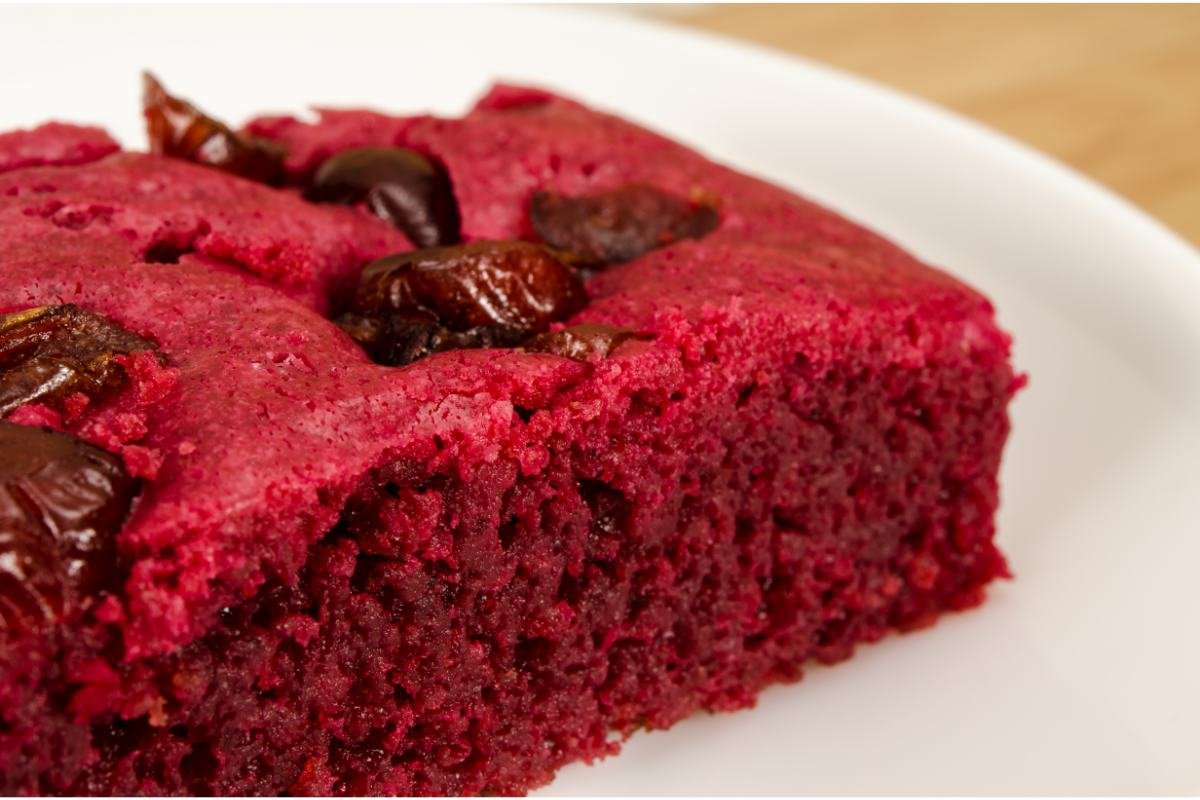
To achieve the signature red velvet color, red food coloring is a must. While the natural reaction between cocoa powder and acidic ingredients does provide some red tint, food coloring elevates this to the bright, rich shade that red velvet is known for. Liquid, gel, or powder food colorings can be used, with the amount adjusted according to the product’s concentration and your desired intensity of color.
Flour: The Structure
All-purpose flour gives the brownies their structure. It’s important to measure the flour correctly; too much can make the brownies dry and cakey, while too little may result in a batter that’s too wet. For the best texture, sift the flour before adding it to the mix, ensuring it incorporates smoothly without clumps.
Sugar, Eggs, and Butter: The Essentials
No brownie would be complete without sugar, eggs, and butter. Sugar not only sweetens the brownies but also helps in creating a crisp top layer. Eggs bind the ingredients together and add to the richness, while butter provides moisture, flavor, and a tender crumb. For red velvet brownies, ensure your butter is at room temperature to mix evenly with the sugar, creating a light and fluffy base for your batter.
By understanding the role of each ingredient in red velvet brownies, bakers can master the delicate balance of flavors and textures that make this dessert so beloved. With these components in hand, you’re ready to embark on the journey of creating the ultimate red velvet brownies that are as visually striking as they are delicious.
Step-by-Step Recipe Guide for Red Velvet Brownies
Creating the perfect red velvet brownies involves more than just mixing ingredients together. It’s about understanding the process and the nuances that lead to that perfect bite. This guide will walk you through each step, ensuring clarity and success in your baking endeavor.
Preparation: Setting the Stage
- Preheat Your Oven: Start by preheating your oven to 350°F (175°C). Consistent temperature is key for even baking.
- Prepare the Baking Pan: Line an 8×8 inch baking pan with parchment paper, allowing some overhang for easy removal of the brownies later. Lightly grease the paper.
- Sift Dry Ingredients: Sift together 1 cup of all-purpose flour, 1 tablespoon of cocoa powder, and ½ teaspoon of salt. Sifting prevents clumps and ensures a smooth batter.
Mixing the Batter: The Art of Blending
- Cream Butter and Sugar: In a large mixing bowl, beat ½ cup of unsalted butter (room temperature) with 1½ cups of white sugar until light and fluffy. This introduces air into the batter, contributing to a lighter texture.
- Add Eggs and Vanilla: Beat in 2 large eggs, one at a time, followed by 1 teaspoon of vanilla extract, ensuring each is fully incorporated before adding the next.
- Incorporate Color and Cocoa: Mix in 2 tablespoons of red food coloring and the sifted cocoa powder until evenly colored. The batter should be vividly red and smooth.
- Blend in Dry and Wet Ingredients Alternately: Alternately add the sifted dry ingredients and ¾ cup of buttermilk, starting and ending with the dry mix. This method prevents the batter from curdling and ensures a uniform texture.
- Stir in Vinegar and Baking Soda: Finally, mix in 1 teaspoon of white vinegar and ½ teaspoon of baking soda. This reaction helps the brownies rise and develop their signature texture.
Baking: The Transformation
- Pour and Smooth the Batter: Pour the batter into the prepared pan, smoothing the top with a spatula. Ensuring an even layer helps the brownies bake uniformly.
- Bake to Perfection: Bake for 25-30 minutes, or until a toothpick inserted into the center comes out with a few moist crumbs. Avoid overbaking, as this can dry out the brownies.
- Cool Before Cutting: Let the brownies cool in the pan on a wire rack for at least 10 minutes. Then, use the parchment paper overhang to lift them out and cool completely before cutting. This patience ensures clean slices.
Final Touches: Presentation and Enjoyment
- Cut into Squares: Using a sharp knife, cut the brownies into squares or rectangles. For cleaner cuts, dip the knife in hot water and wipe it off between cuts.
- Serve and Enjoy: Serve your red velvet brownies as is, or dust them with powdered sugar for an extra touch of elegance. They pair beautifully with a glass of milk or a cup of coffee.
Following these detailed steps will help you create red velvet brownies that are not only visually stunning but also irresistibly delicious. Each phase, from preparation to presentation, is crucial in achieving the perfect outcome, ensuring your brownies are the highlight of any dessert table.
Variations and Modifications for Red Velvet Brownies
Red velvet brownies are versatile, allowing for numerous variations and modifications to suit different dietary needs or flavor preferences. Here, we explore creative twists and alternatives to the classic recipe, ensuring everyone can enjoy this delightful treat.
Gluten-Free Red Velvet Brownies
- Swap the Flour: Replace all-purpose flour with an equal amount of gluten-free all-purpose flour blend. Look for a blend that includes xanthan gum, which helps mimic the texture of gluten.
- Check Your Cocoa: Ensure your cocoa powder is certified gluten-free, as cross-contamination can occur during processing.
Vegan Red Velvet Brownies
- Dairy Alternatives: Substitute buttermilk with a plant-based version by mixing ¾ cup of soy or almond milk with 1 teaspoon of apple cider vinegar. Let it sit for 5 minutes before using.
- Egg Replacements: Use flax eggs in place of regular eggs. Mix 2 tablespoons of ground flaxseed with 6 tablespoons of water, and let it sit for 15 minutes until it becomes gel-like.
- Vegan Butter: Use a plant-based butter alternative for traditional butter to keep the richness without the dairy.
Nutty Red Velvet Brownies
- Add Crunch: Introduce ½ cup of chopped pecans or walnuts into the batter for an added crunch that complements the soft texture of the brownies.
- Toast the Nuts: For an enhanced flavor, lightly toast the nuts in a dry skillet over medium heat until fragrant before adding them to the batter.
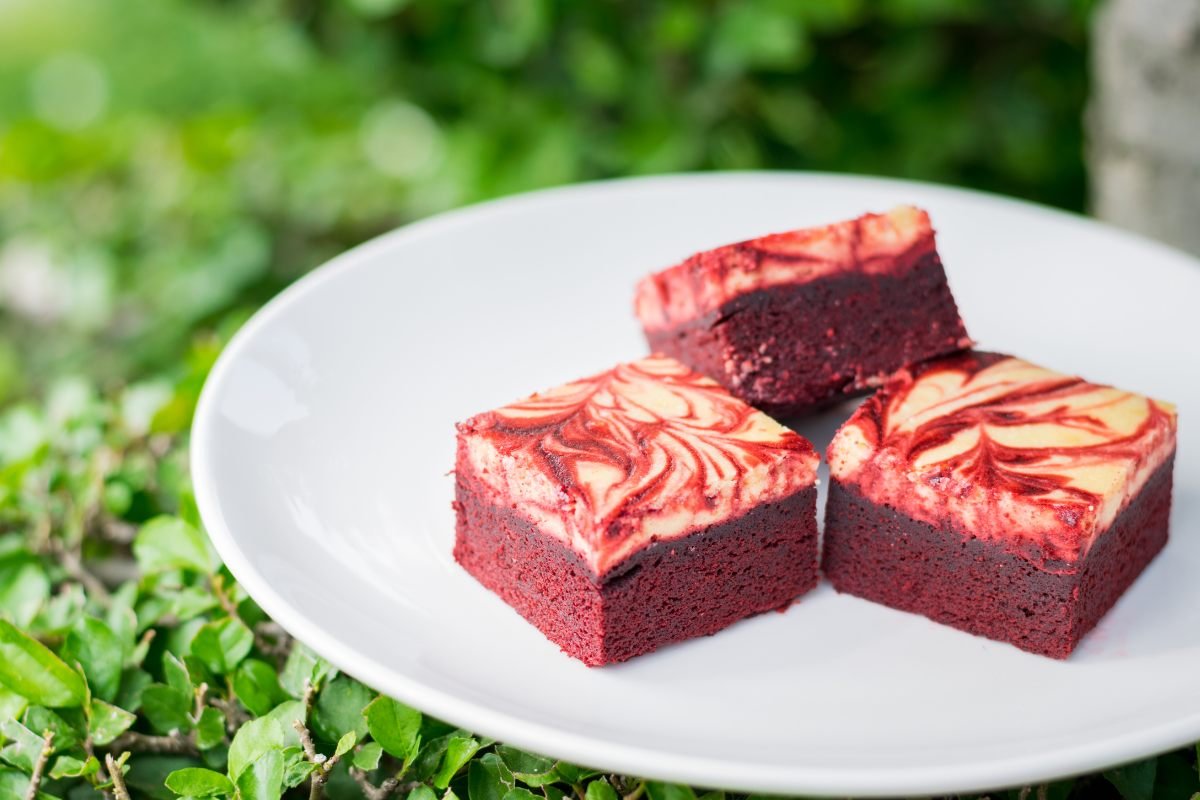
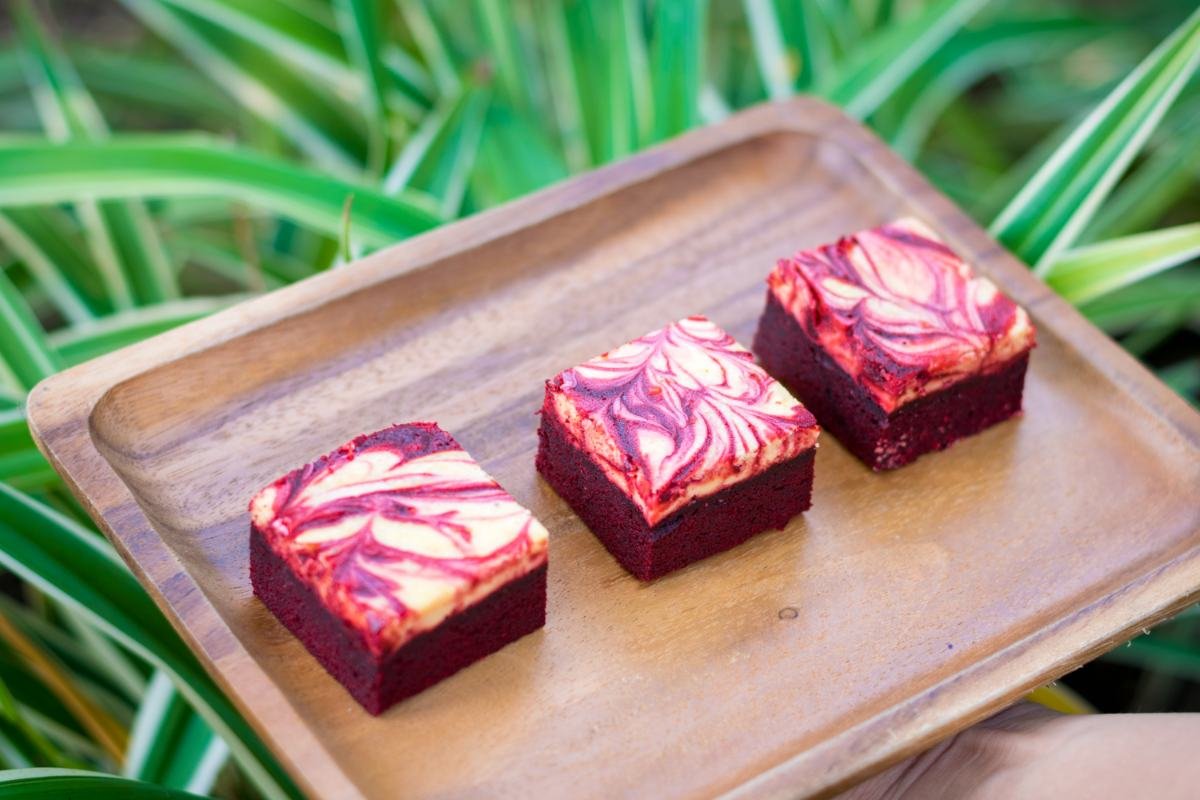
Cream Cheese Swirl Red Velvet Brownies
- Prepare Cream Cheese Mixture: Beat together 8 ounces of softened cream cheese, ¼ cup of sugar, 1 egg, and 1 teaspoon of vanilla extract until smooth.
- Layer and Swirl: Pour half of the red velvet batter into the pan, add dollops of the cream cheese mixture, then cover with the remaining batter. Use a knife to gently swirl the two mixtures together.
- Bake as Usual: Follow the same baking instructions, noting that the addition of cream cheese might require a few extra minutes in the oven.
White Chocolate Chip Red Velvet Brownies
- Mix in White Chocolate: Gently fold 1 cup of white chocolate chips into the batter just before pouring it into the baking pan. The chips add a creamy texture and a sweetness that balances the cocoa.
- Reserve Some for Topping: Sprinkle a handful of white chocolate chips over the top of the batter before baking for a visually appealing finish.
These variations and modifications allow bakers to tailor red velvet brownies to personal tastes and dietary restrictions. Whether seeking a gluten-free option, aiming to satisfy vegan dietary needs, or simply looking for a twist on the classic recipe, these alternatives ensure that the delightful experience of red velvet brownies can be shared by all. Experimenting with these options not only broadens the appeal of red velvet brownies but also showcases the versatility of this beloved dessert.
Serving and Presentation Ideas for Red Velvet Brownies
Once you’ve mastered the art of baking red velvet brownies, the next step is to present them in a way that’s as visually appealing as they are delicious. Here, we explore various serving and presentation ideas to make your red velvet brownies stand out, whether you’re serving them at a casual gathering or a formal event.
Cutting and Serving Sizes
- Uniform Squares: For a classic look, cut your brownies into uniform squares. A 2-inch square is a good standard size for individual servings, providing a perfect balance between indulgence and portion control.
- Rectangular Slices: For a more elegant presentation, consider cutting the brownies into rectangular slices. This shape is particularly appealing when serving brownies as part of a dessert platter or at formal occasions.
- Mini Bites: For large gatherings or as part of a dessert buffet, cut the brownies into small, bite-sized pieces. This allows guests to sample a variety of desserts without committing to a large slice.
Creative Decoration Ideas
- Dusting with Powdered Sugar: A light dusting of powdered sugar can add an elegant finish to your red velvet brownies. Use a fine sieve for even distribution, and do this right before serving to maintain the best appearance.
- Cream Cheese Drizzle: Prepare a thin cream cheese frosting and drizzle it over the brownies for a delightful contrast in flavors. The white frosting against the red-brown color of the brownies creates a visually appealing effect.
- Fresh Berry Topping: Garnish each brownie with a fresh raspberry or a slice of strawberry to add a burst of color and a hint of tartness that complements the sweet and tangy flavors of the red velvet.
Serving Suggestions for Different Occasions
- Casual Gatherings: Serve the brownies on a rustic wooden board for a casual yet stylish presentation. Accompany with napkins for a laid-back, communal vibe.
- Formal Events: Plate individual brownies on elegant dessert plates, each garnished with a dollop of whipped cream and a fresh berry. This presentation elevates the brownies to a dessert suitable for formal dining.
- Holiday Themes: Customize your presentation to fit holiday themes. For Christmas, add green sprinkles along with the powdered sugar to evoke a festive spirit. For Valentine’s Day, cut brownies into heart shapes using a cookie cutter and serve on a plate with a dusting of cocoa powder.
Pairings and Combinations with Red Velvet Brownies
Pairing red velvet brownies with complementary flavors and textures can elevate the overall dessert experience. This section explores ideal beverages and dessert combinations that harmonize with the rich, tangy, and slightly chocolaty profile of red velvet brownies, ensuring a memorable tasting experience.
Beverage Pairings
- Coffee: The bold, rich flavors of coffee make it an excellent companion to red velvet brownies. A hot espresso or an iced latte can cut through the sweetness, balancing each bite with a refreshing bitterness.
- Milk: Classic for a reason, cold milk complements the dense, moist texture of brownies, providing a creamy contrast that enhances the brownie’s flavors without overpowering them.
- Red Wine: For an adult indulgence, pair red velvet brownies with a glass of red wine. Choose a wine with fruity notes, like a Merlot or Zinfandel, to complement the brownie’s cocoa and tangy notes.
Dessert Combinations
- Vanilla Ice Cream: Serve a scoop of vanilla ice cream alongside your red velvet brownie for a classic combination. The creaminess of the ice cream juxtaposes the brownie’s dense texture, and its coldness adds a refreshing element.
- Whipped Cream and Berries: Top your brownies with a dollop of whipped cream and a scattering of fresh berries for a lighter, fruitier dessert option. The berries add a tartness that cuts through the richness, while the whipped cream adds a luxurious finish.
- Cheesecake Layer: For a decadent dessert, layer your red velvet brownies with a thin cheesecake mixture before baking. This combination creates a stunning visual contrast and a taste profile that merges the tangy creaminess of cheesecake with the dense, chocolaty brownie base.
These pairings and combinations offer a roadmap to creating an enhanced dessert experience with red velvet brownies. Whether you’re looking for the perfect drink to accompany a cozy night in or seeking to impress guests with a sophisticated dessert pairing at your next dinner party, these suggestions promise to delight and surprise. Experimenting with these pairings not only showcases the versatility of red velvet brownies but also encourages culinary creativity, making each serving a unique occasion.
Common Mistakes and FAQs about Making Red Velvet Brownies
Baking the perfect red velvet brownies can be a rewarding experience, yet it presents certain challenges that may daunt even the most enthusiastic bakers. Consequently, understanding and avoiding common mistakes, as well as seeking answers to frequently asked questions, become crucial steps toward ensuring your baking success.
Common Mistakes to Avoid
Firstly, overmixing the batter is a common pitfall that can lead to brownies that are too dense or tough, as it develops the gluten in the flour more than necessary. Therefore, it’s advisable to mix just until the ingredients are combined.
Secondly, many bakers make the mistake of skipping the sift. Failing to sift your dry ingredients, especially cocoa powder and flour, can result in lumpy batter. Sifting not only prevents this but also helps to incorporate air, ensuring a smoother, more uniform batter.
Moreover, using the wrong type of cocoa can dramatically affect the outcome. Natural unsweetened cocoa powder is essential for red velvet brownies, as it reacts with the acidic ingredients to produce the classic color and flavor. Conversely, Dutch-processed cocoa has been alkalized, so it won’t react the same way.
Furthermore, overbaking is a mistake that’s easy to make but can severely dry out your brownies. Begin checking for doneness a few minutes before the recommended baking time to ensure they remain moist and slightly fudgy.
Frequently Asked Questions (FAQs)
Additionally, here are answers to some FAQs that might help you navigate through common queries:
- Can I make red velvet brownies without food coloring? Absolutely, you can. While the brownies will still have a slight reddish tint from the cocoa powder’s reaction with acidic ingredients, they won’t be as vividly red as those made with food coloring.
- How do I store red velvet brownies? Ideally, you should store them in an airtight container at room temperature for up to 3 days. For longer storage, refrigerating them for up to a week or freezing them for up to 3 months is recommended. Always remember to thaw frozen brownies overnight in the refrigerator before serving.
- Can I use beet juice as a natural coloring? Yes, beet juice can be a natural alternative to artificial food coloring. However, it’s important to note that it might add a slight beet flavor, and the color might not be as bright red.
- What’s the best way to cut brownies cleanly? For the cleanest cuts, use a sharp knife and wipe it clean with a damp cloth between cuts. Chilling the brownies before cutting can also simplify the process.
- Can I double the recipe? Certainly! Just ensure to use a pan that’s double the size of the recommended one, and adjust the baking time as needed, keeping a close eye on the brownies as they bake.
Conclusion
In exploring the rich world of red velvet brownies, we’ve ventured through the essentials of crafting, customizing, and pairing this beloved dessert. Whether you’re a seasoned baker or a curious novice, the journey through the flavors, textures, and creative possibilities of red velvet brownies is bound to inspire and delight. For those eager to continue exploring and expanding their culinary repertoire, remember that the adventure doesn’t end here. Visit recipeszap.com for more delicious ideas and recipes that will transform your baking into an art form. Happy baking!