
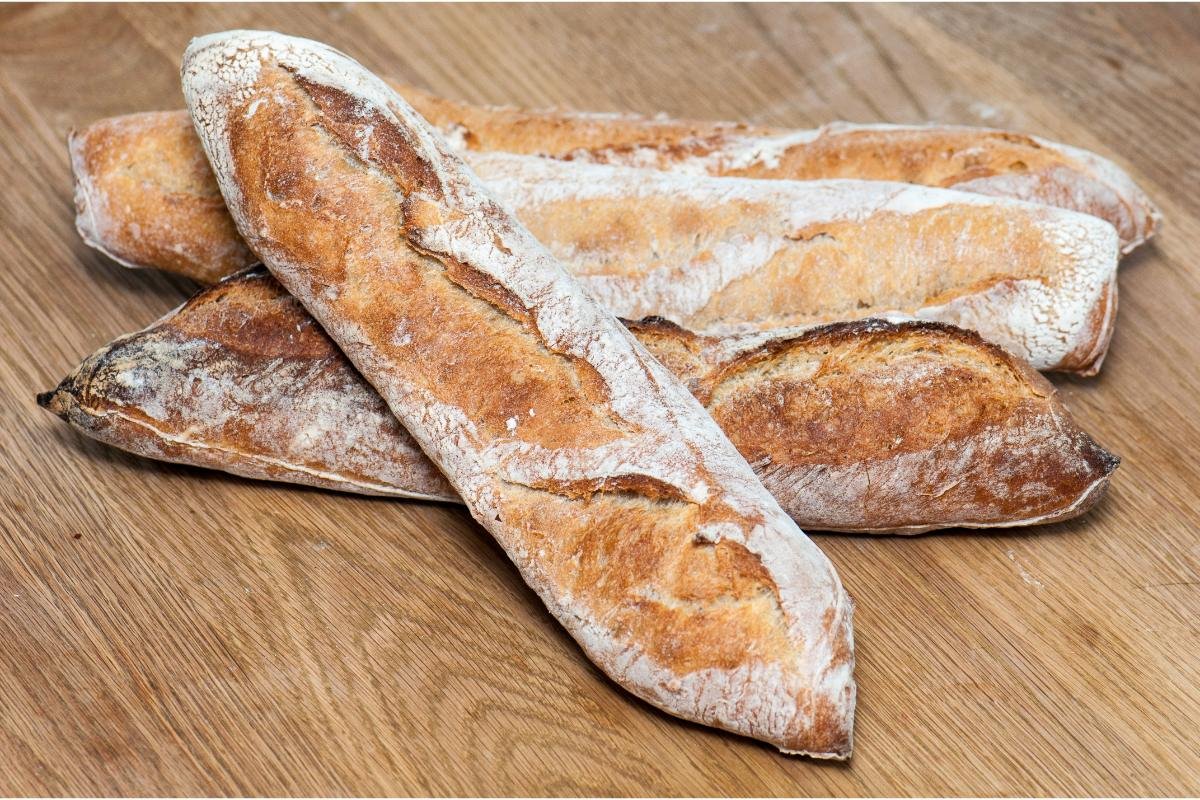
Mastering the French bread recipe is an art that brings the essence of France into your kitchen. This guide will walk you through every step of crafting the perfect loaf, from selecting the right ingredients to baking a bread with a crisp crust and fluffy interior. Whether you’re a novice baker or looking to refine your skills, this French bread recipe will become your go-to for impressive, homemade bread.
Ingredients Explained for Your French Bread Recipe

At the heart of French bread lies its simplicity. With only four essential ingredients, the magic of French bread comes from the quality of these components and the technique of the baker. Here’s what you’ll need:
- Flour: High-protein flour, preferably bread flour, is essential for developing strong gluten networks, giving the bread its structure and chew. The quality of the flour can significantly affect the bread’s texture and flavor.
- Water: Hydration plays a key role in the dough’s consistency and the bread’s final texture. The temperature of the water also affects yeast activity – lukewarm water is ideal.
- Yeast: Yeast is the leavening agent that causes the dough to rise. While fresh yeast is traditional, active dry or instant yeast are more accessible and work just as well.
- Salt: Salt not only enhances flavor but also regulates yeast activity, ensuring a slow, steady rise and contributing to the crust’s color.
Choosing quality ingredients is paramount. For instance, opting for a reputable brand of flour and fresh, clean water can make a noticeable difference in your bread. Each ingredient contributes not just to the taste but to the experience of French bread, making each bite a tribute to the tradition of French baking.
Essential Equipment for Baking French Bread
Creating authentic French bread at home is an art that requires precision, patience, and the right set of tools. While the list of equipment might vary slightly based on personal preferences or baking techniques, certain essentials will help ensure your success. Let’s explore the tools you’ll need to bring your French bread to life, focusing on both essential and optional items to enhance your baking experience.
Essential Tools for French Bread
- Digital Scale: Precision is key in baking. Use a digital scale to measure your ingredients accurately. This ensures consistency in your dough and the overall quality of your bread.
- Mixing Bowls: A set of mixing bowls of various sizes will serve you well. You’ll need them for mixing the dough and allowing it to rise.
- Dough Scraper: This simple tool is invaluable for handling and cutting dough. It helps in transferring dough from the bowl to your work surface and dividing it with precision.
- Baking Stone or Baking Sheet: A baking stone simulates the base of a professional baker’s oven, giving your bread a beautifully crisp crust. If you don’t have one, a heavy-duty baking sheet can suffice.
- Oven Thermometer: Since accurate baking temperatures are crucial, an oven thermometer will ensure your oven is precisely calibrated, compensating for any inaccuracies in its built-in thermostat.
Optional Tools to Elevate Your Baking
- Banneton Baskets: These wicker baskets are used for the final rise, helping to shape your dough and impart a beautiful pattern on the crust. They’re not essential, but they can add an artisanal touch.
- Lame or Sharp Knife: A lame (a razor blade on a handle) or a very sharp knife is used for scoring the dough right before baking. This allows the bread to expand properly during baking and can add an aesthetic element to your loaf.
- Pastry Brush: For applying glazes or water to your dough pre-baking, a pastry brush is quite handy. It helps in achieving the perfect crust texture and color.
- Spray Bottle: A fine mist of water sprayed into the oven just before baking helps create steam, which is key to a shiny, crackling crust. A simple spray bottle will do the trick.
Tips for Using Your Baking Equipment
- Preheat Your Baking Stone: If you’re using a baking stone, remember to place it in the oven during the preheating phase. This ensures it’s at the right temperature when you slide your dough onto it.
- Maximize Oven Steam: In addition to using a spray bottle, you can place a shallow pan of water on the bottom rack of your oven. The water will evaporate during baking, increasing the oven’s humidity and improving the crust.
- Maintain Your Equipment: Keep your tools in good condition. Regularly clean and dry your baking stone, sharpen your lame or knife, and ensure your digital scale is calibrated.
By gathering these tools and familiarizing yourself with their uses, you’re setting the stage for successful French bread baking. Each piece of equipment plays a role in transforming simple ingredients into a masterpiece of texture and flavor. In the next section, we’ll dive into the preparation steps, where you’ll put these tools to work and bring the dough to life.
Mixing and Kneading: The Heart of the French Bread Recipe
Embarking on the journey of making French bread involves several meticulous steps that transition simple ingredients into a loaf with a golden crust and tender interior. This section will guide you through the preparation process, emphasizing the importance of technique and timing. Let’s begin.
Initial Preparations: Setting the Stage
- Measure Your Ingredients: Start by accurately measuring all your ingredients using a digital scale. Precision is crucial for the balance of flavors and textures in your bread.
- Activate the Yeast: If you’re using active dry yeast, dissolve it in lukewarm water to activate it. This step ensures your yeast is alive and ready to work its magic in making the dough rise. Instant yeast can be mixed directly with the flour.
- Prepare Your Workspace: Clear a large area on your counter and have all your tools within reach. A clean, well-organized workspace streamlines the baking process and reduces stress.
Mixing and Kneading the Dough
- Combine Ingredients: In a large mixing bowl, whisk together the flour and salt. Gradually add the water-yeast mixture, stirring until a rough dough forms. This initial mix is about bringing the ingredients together; the dough will look shaggy and uneven at this stage.
- Knead the Dough: Transfer the dough to a lightly floured surface and knead by hand for about 10 to 15 minutes. The goal is to develop the gluten, which gives the bread its structure. You’ll know the dough is ready when it’s smooth, elastic, and slightly tacky but not sticky.
- Let the Dough Rest: After kneading, form the dough into a ball and place it back in the bowl. Cover it with a damp cloth or plastic wrap to prevent drying. This rest period allows the gluten strands to relax, making the dough easier to shape later.
First Rise: The Bulk Fermentation
- Find the Perfect Spot: Choose a warm, draft-free area for the dough to rise. The ideal temperature is around 75°F (24°C) to 78°F (25°C). If your kitchen is cool, you can place the bowl in an off oven with the light on for gentle warmth.
- Allow the Dough to Double: This first rise, or bulk fermentation, is crucial for flavor development and texture. Depending on the room temperature and yeast activity, this can take anywhere from 1 to 2 hours. The dough should roughly double in size and look puffy but still retain some shape.
- Test for Readiness: Gently poke the dough with a finger. If the indentation slowly springs back but still leaves a noticeable impression, the dough is ready for the next step. If it springs back quickly, give it more time.
This preparation phase is foundational to the quality of your French bread. It sets the stage for the shaping, second rise, and baking steps that follow. By adhering to these detailed instructions, you’re well on your way to crafting a loaf that’s a testament to the art of French baking.
In the next section, we’ll delve into shaping the dough and preparing it for its final rise, bringing us one step closer to the perfect French bread.
Shaping the Dough
After the first rise, the dough is ready to be shaped. This stage is where your loaf begins to take form, and with the right technique, you’ll ensure it bakes into a beautiful, artisan-quality bread. Let’s dive into the steps and tips for shaping your dough with precision and care.
Preparing for Shaping
- Gently Deflate the Dough: First, lightly flour your work surface and turn the dough out onto it. Gently press down on the dough to deflate any large gas bubbles, being careful not to overwork it and lose all the air that contributes to the bread’s texture.
- Divide the Dough (If Necessary): If you’re making multiple loaves, use your dough scraper to divide the dough into equal portions. Precision is key, so consider weighing each piece to ensure they bake uniformly.
Shaping Techniques
- Forming a Boule (Round Loaf): Start by folding the dough over itself from all sides towards the center, then flip it over. Cup your hands around the dough and rotate it on the work surface to tighten its shape. This technique creates surface tension, which helps the loaf maintain its shape during baking.
- Shaping a Baguette or Batard: For a baguette or batard, gently roll and stretch the dough into a log or oval shape, respectively. Fold the dough lengthwise, slightly off-center, and seal the seam by pressing it with the heel of your hand. Then, roll the dough with both hands to elongate it to the desired length, tapering the ends if you’re making a baguette.
The Second Rise: Proofing
- Prepare for Proofing: Line a baking sheet with parchment paper or lightly flour a banneton basket. If using a baking sheet, you can create a makeshift couche (proofing cloth) by folding a heavily floured cloth into ridges to support the dough’s shape.
- Let the Dough Rise Again: Place your shaped dough onto the prepared surface, seam side down if it’s on a baking sheet or seam side up in a banneton. Cover the dough loosely with a damp cloth or plastic wrap to prevent it from drying out.
- Proof to Perfection: This second rise, or proofing, is shorter than the first—typically 45 minutes to 1 hour. The dough should increase in size by about half and feel slightly puffy. To test, gently press the dough with a finger; the dough should slowly spring back but leave a slight indentation.
Final Touches Before Baking
- Preheat Your Oven: Ensure your oven is preheated to the correct temperature with your baking stone or baking sheet inside. Remember, a hot oven is crucial for achieving that initial oven spring and crust development.
- Prepare for Steam: If you’re using a spray bottle or pan of water to create steam, have them ready. Steam in the oven’s first few minutes of baking is essential for a glossy, crackling crust.
By mastering the shaping and second rise of your French bread, you’re not just crafting dough into a loaf; you’re breathing life into it, setting the stage for the magical transformation that occurs in the oven. In the next section, we’ll cover the baking process in detail, guiding you through the final steps to achieve the perfect French bread.
Baking Process
The climax of the French bread-making journey is the baking process. This stage transforms the carefully prepared and shaped dough into a golden, aromatic loaf with a crisp crust and tender crumb. Following the right baking techniques and tips is crucial for achieving the best results. Let’s walk through the steps to bake your French bread to perfection.
Preheating the Oven
- Set the Right Temperature: Begin by preheating your oven to a high temperature, typically around 475°F (245°C). This high heat is essential for achieving a good oven spring, which is the rapid rise of the dough during the first few minutes of baking due to steam and heat.
- Place Your Baking Stone or Sheet: If you’re using a baking stone, ensure it’s in the oven from the start of preheating. For those using a baking sheet, place it in the oven to get hot. A preheated surface helps in creating a crispy bottom crust.
Creating Steam
- Prepare for Steam: Steam is crucial in the initial phase of baking. It keeps the crust soft temporarily, allowing the bread to expand freely. If you have a spray bottle, fill it with water. Alternatively, have a shallow pan ready to fill with hot water and place in the oven.
- Introduce Steam: Right before you place the dough in the oven, spray the oven walls with water from your spray bottle or place the pan filled with hot water on the bottom rack. Be quick and careful to avoid steam burns.
Baking the Bread
- Score the Dough: Just before baking, score the top of your dough with a lame or sharp knife. Make quick, decisive slashes about a quarter-inch deep. This controls how the bread expands and adds an artisanal look to your loaf.
- Transfer the Dough to the Oven: Carefully place your dough onto the preheated baking stone or sheet. If using parchment paper, you can transfer the dough on the paper directly to the baking surface.
- Bake with Precision: Bake the bread at the high temperature for the first 10 to 15 minutes, then reduce the temperature to around 400°F (205°C) for the remainder of the baking time. This initial blast of heat helps with rising, while the lower temperature ensures the bread cooks through without burning.
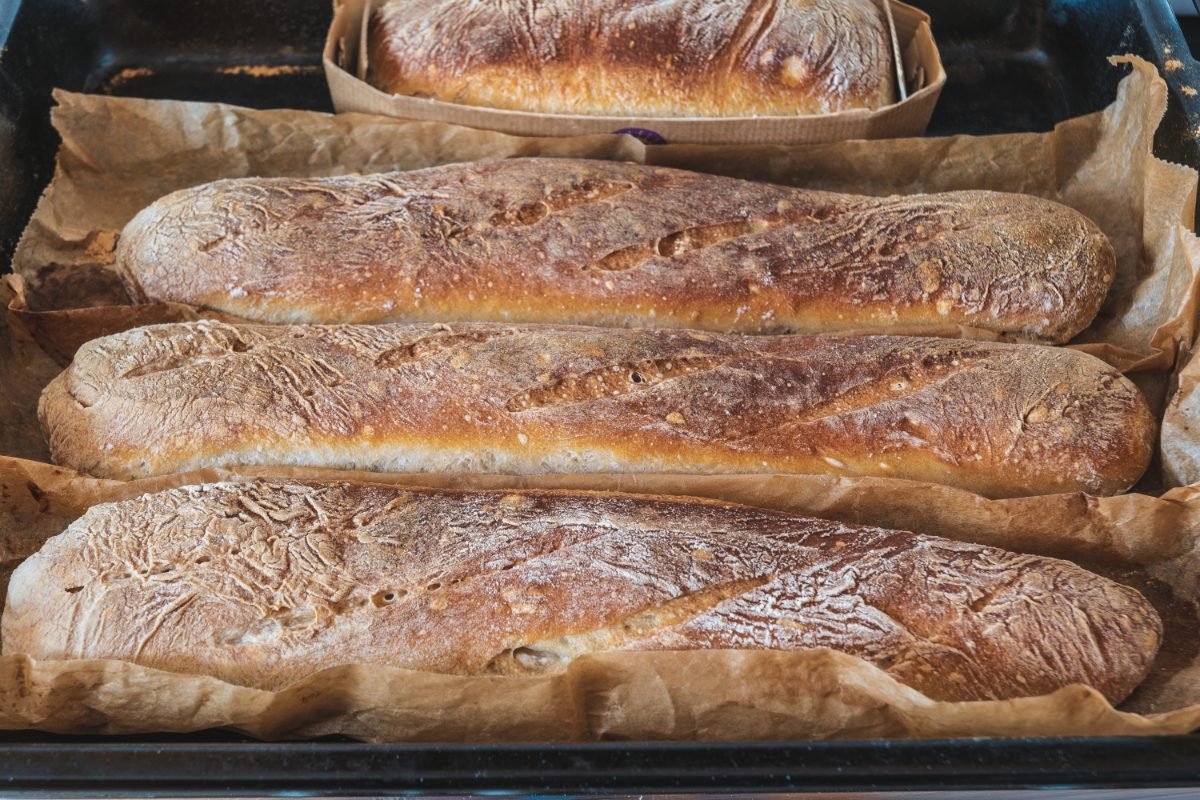
- Monitor the Color and Crust: The bread is done when it has a deep golden brown color, and the crust is crisp. Tapping the bottom of the loaf should produce a hollow sound, indicating it’s fully baked. The total baking time can vary, typically ranging from 20 to 30 minutes, depending on the size of your loaf.
Cooling the Bread
- Cool on a Wire Rack: Once baked, remove the bread from the oven and transfer it to a wire rack to cool. This stops the baking process and prevents the crust from becoming soggy. Cooling also allows the bread’s interior structure to set, making it easier to slice.
Achieving the perfect French bread requires attention to detail, especially during the baking process. From preheating your oven and introducing steam to scoring and carefully monitoring the bake, each step contributes to the final quality of your loaf. With practice and patience, you’ll master the art of baking French bread, creating loaves that are not only delicious but also a testament to your baking skills.
In the following sections, we will provide additional tips for after your bread is baked, including cooling, storage, and troubleshooting common baking issues.
Post-Baking Tips
After your French bread has emerged from the oven, golden and fragrant, a few key steps remain to ensure its quality and longevity. Cooling, slicing, and storing your bread properly are crucial aspects of the baking process that sometimes go overlooked but are essential for the perfect end result. Let’s explore these final steps in detail.
Cooling Your Bread
- Transfer to a Wire Rack Immediately: Once you remove your bread from the oven, place it on a wire rack to cool. This prevents steam from collecting underneath, which could lead to a soggy bottom crust.
- Resist the Temptation to Slice Immediately: As tempting as it might be to slice into your warm bread, it’s important to wait until it has fully cooled. Cutting too soon can cause the interior to become gummy. Cooling typically takes about 1 to 2 hours, depending on the size of your loaf.
Slicing Your Bread
- Use a Serrated Knife: When your bread has completely cooled, use a sharp serrated knife to slice it. This type of knife cuts through the crust without crushing the tender crumb inside.
- Slice as Needed: To maintain freshness, slice your bread as you use it rather than all at once. This minimizes exposure to air, which can dry out the bread.
Storing Your Bread
- Room Temperature Storage: Store your bread at room temperature in a bread box or a paper bag. This helps to maintain the crust’s texture. Avoid plastic bags, which can trap moisture and soften the crust.
- Freezing for Longer Storage: If you won’t finish your bread within a couple of days, you can freeze it for longer storage. Slice the bread before freezing and store it in a freezer-safe bag. When you’re ready to eat, you can thaw slices at room temperature or toast them directly from the freezer.
Refreshing Your Bread
- Revive Stale Bread: If your bread begins to stale, you can revive it by lightly sprinkling it with water and warming it in a hot oven (about 375°F or 190°C) for a few minutes. The crust will crisp up, and the interior will become more tender.
By following these post-baking tips, you ensure that your French bread retains its quality from the moment it leaves the oven until the last slice is enjoyed. Cooling, slicing, and storing your bread properly are as important as the baking process itself, contributing to the overall success of your baking endeavor.
Conclusion
Baking French bread at home is an immensely rewarding experience that brings a taste of France right to your kitchen. Through understanding the importance of quality ingredients, mastering the art of dough preparation and handling, and honing your baking techniques, you’re well on your way to creating loaves that boast a perfect crust and tender crumb. Remember, each step, from mixing to cooling, plays a pivotal role in the outcome of your bread. With practice, patience, and passion, you’ll continue to improve and perhaps even develop your unique variations of this classic bread.
For more delightful baking recipes and culinary inspiration, don’t forget to visit RecipesZap.com. Whether you’re looking to expand your repertoire with more bread recipes or explore other cuisines, you’ll find a wealth of recipes waiting to be discovered.
Happy baking, and may your kitchen always be filled with the inviting aroma of freshly baked bread!