
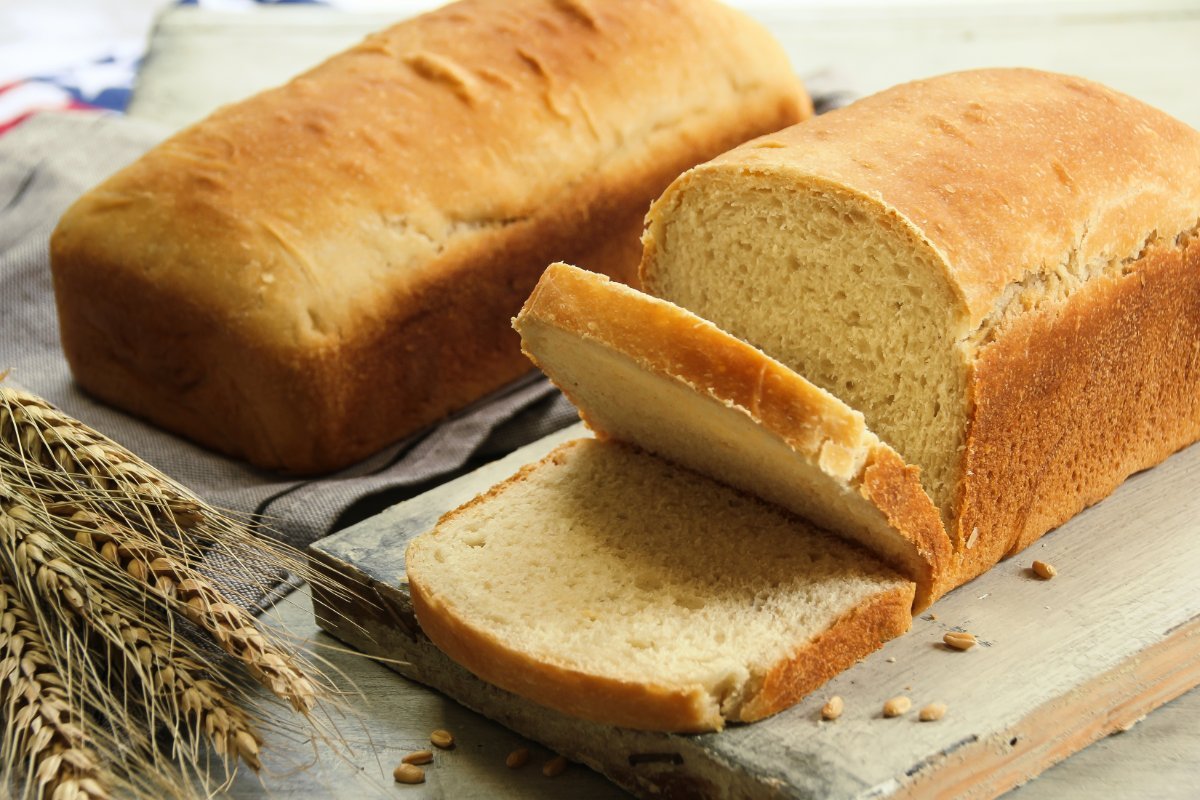
There’s something almost magical about baking sourdough bread at home. The aroma of freshly baked bread, the crackling sound as it cools, and the first bite of a loaf you’ve nurtured from flour and water to a beautiful, crusty creation. Sourdough sandwich bread brings this magic into our daily lives, transforming an ordinary sandwich into a gourmet experience.
Unlike commercial yeast breads, sourdough utilizes a natural leavening process that not only contributes to its distinct tangy flavor but also enhances its nutritional profile. Making sourdough sandwich bread at home allows you to control the ingredients, avoiding the additives and preservatives found in store-bought bread. Moreover, the process of baking sourdough can be incredibly satisfying, offering a tangible connection to the age-old tradition of bread making.
In this comprehensive guide, we’ll explore the art and science of making sourdough sandwich bread. Whether you’re a seasoned baker or a newcomer to the world of sourdough, this blog will provide you with the knowledge, techniques, and inspiration to bake your own delicious, healthful bread.
Understanding Sourdough
Sourdough is more than just bread; it’s a testament to the simplicity and complexity of fermentation. At its core, sourdough bread is made from just three basic ingredients: flour, water, and salt. The magic ingredient, however, is the sourdough starter—a fermented mixture of flour and water that houses wild yeast and beneficial bacteria.
The fermentation process not only leavens the bread, giving it rise and texture, but also breaks down gluten and phytic acid, making sourdough more digestible and its nutrients more accessible than those of its commercially yeasted counterparts. This natural fermentation imbues the bread with its characteristic sour flavor, which can range from mildly tangy to robustly acidic, depending on the fermentation time and the makeup of the starter.
Sourdough’s uniqueness lies in its reliance on the environment. The wild yeast and bacteria present in the flour and air vary from place to place, making each sourdough starter and, consequently, each loaf of bread, unique to its environment. This local variation contributes to the diversity of sourdough flavors and textures, making sourdough baking both an art and a science.
Benefits of Sourdough for Sandwich Bread
Sourdough sandwich bread isn’t just delicious—it’s a healthier, more digestible option that brings variety to your meals. Let’s delve into the benefits of choosing sourdough for your sandwich bread.
Enhanced Digestibility
Sourdough’s natural fermentation process breaks down gluten, the protein that can cause sensitivity in some individuals. This breakdown results in a bread that many people find easier to digest compared to those made with commercial yeast. Furthermore, the fermentation process pre-digests the flour, meaning your body has to do less work.
Rich Nutritional Profile
The fermentation not only improves digestibility but also enhances the nutritional content of the bread. Sourdough fermentation increases the availability of important nutrients such as iron, zinc, and magnesium. Additionally, it’s a natural probiotic, supporting gut health with beneficial bacteria.
Lower Glycemic Index
Sourdough bread has a lower glycemic index (GI) compared to regular bread. This means it causes a slower rise in blood sugar levels. For anyone monitoring their blood sugar or looking to maintain steady energy levels throughout the day, sourdough sandwich bread is an excellent choice.
Complex Flavors and Improved Texture
Sourdough boasts a depth of flavor that commercial yeast breads simply can’t match. The slow fermentation process develops tangy, complex flavors and a pleasing sourness that enhances any sandwich. Moreover, the texture of sourdough bread—with its chewy interior and crisp crust—adds an enjoyable contrast to the soft fillings of a sandwich.
Longer Shelf Life
Thanks to the acidic environment created during fermentation, sourdough bread naturally resists mold and stales slower than its commercial yeast counterparts. This longer shelf life means you can bake less frequently while still enjoying fresh, delicious bread.
Versatility in Recipes
Sourdough’s adaptability is another of its strengths. You can tweak your sourdough sandwich bread recipe to include whole grains, seeds, nuts, or even dried fruits. This versatility allows you to customize the nutritional profile and flavor of your bread to suit your tastes and dietary needs.
Sourdough Starter 101
Embarking on your sourdough journey begins with creating a lively sourdough starter. This living culture, teeming with wild yeast and beneficial bacteria, acts as the heart of your sourdough bread. Let’s break down the process, offer tips for success, and troubleshoot common issues.
Creating Your Starter
Kickstart Your Culture: Combine equal parts flour and water in a clean jar. Whole grain flours like rye or whole wheat often give your starter a robust beginning, thanks to their higher nutrient content. Use lukewarm water to encourage yeast activity.
Daily Feeding Routine: Feed your starter daily with equal parts flour and water. If using a 1:1:1 ratio, mix 50 grams of starter with 50 grams of water and 50 grams of flour. This consistent feeding keeps your starter healthy and active.
Maintaining Your Sourdough Starter
Find the Perfect Spot: Keep your starter in a warm, draft-free area. Temperatures around 68°F to 75°F (20°C to 24°C) are ideal for fermentation.
Watch for Signs of Activity: Bubbles and a noticeable increase in volume within 4 to 12 hours after feeding indicate a healthy starter. A tangy aroma is a good sign; it should smell pleasantly sour, not unpleasant.
Regular Feeding is Key: Once your starter is established, decide on your baking schedule. If baking frequently, keep your starter at room temperature and feed it daily. For less frequent baking, store your starter in the refrigerator and feed it once a week.
Troubleshooting Your Starter
Liquid on the Surface: A layer of liquid, often called “hooch,” indicates that your starter is hungry. Pour it off, and feed your starter more frequently.
Slow to Rise: If your starter seems sluggish, increase the temperature of its environment slightly, or try feeding it more often. Switching to whole grain flour temporarily can also boost activity.
Mold Growth: If you spot mold or an off smell, it’s safest to start over. Keeping your starter in a clean container and using clean utensils can prevent mold.
Reviving a Neglected Starter
Assess and Act: If you’ve neglected your starter, first assess if it has any mold or an off smell. If it’s clear, you can likely revive it with regular feedings. Begin by discarding all but a small amount (about 1 tablespoon), then feed it with a generous amount of flour and water. Repeat this process until the starter becomes active again.
Creating and maintaining a sourdough starter requires patience and attention, but the reward of baking your own sourdough bread is immeasurable. Remember, each starter has its own personality, shaped by its environment and the care you provide. Embrace the process, and soon you’ll be crafting delicious, tangy loaves that reflect the unique characteristics of your very own sourdough starter.
Ingredients and Tools for Sourdough Sandwich Bread
Crafting the perfect sourdough sandwich bread requires not only patience and skill but also the right ingredients and tools. Let’s dive into what you’ll need to gather before embarking on this baking journey, ensuring everything is at hand for a seamless and enjoyable baking experience.
Essential Ingredients
Sourdough Starter: The soul of your bread, a ripe and active sourdough starter, sets the stage for fermentation and flavor.
Flour: A high-quality bread flour forms the structure of your loaf. For a softer sandwich bread, consider blending bread flour with whole wheat or spelt flour for added nutrition and flavor.
Water: Use lukewarm water to help activate the yeast in your sourdough starter. The temperature of the water can influence the dough’s fermentation rate.
Salt: Besides seasoning, salt regulates yeast activity and strengthens gluten structure, contributing to the bread’s texture and crust.
Optional Add-Ins: For a twist, incorporate ingredients like seeds, nuts, dried fruits, or herbs into your dough. These add-ins can enhance the flavor profile and nutritional value of your bread.
Baking Tools
Digital Scale: Precision matters in baking. A digital scale ensures accurate measurements of ingredients for consistent results.
Mixing Bowls: You’ll need large mixing bowls to combine your ingredients and allow your dough to ferment.
Dough Scraper: This tool helps in handling and folding the dough, making it easier to transfer and shape without sticking.
Banneton Basket: For proofing your dough, a banneton basket lined with a cloth creates a supportive environment, helping your loaf maintain its shape and develop a beautiful pattern on the crust.
Dutch Oven or Baking Stone: A preheated Dutch oven mimics a professional baker’s oven, trapping steam and contributing to the bread’s rise and crust development. Alternatively, a baking stone with a steam tray underneath can achieve a similar effect.
Lame or Sharp Knife: Scoring the dough right before baking allows it to expand properly in the oven, preventing unexpected splits and creating an artisanal look.
Oven Thermometer: To ensure your oven is at the right temperature, an oven thermometer can provide a more accurate reading than the oven’s built-in gauge.
Preparing Your Workspace
Clean and Organize: Start with a clean, spacious workspace. Having all your ingredients and tools laid out before you begin makes the process smoother and more enjoyable.
Temperature Matters: Keep your workspace and ingredients at a comfortable temperature, not too cold, to support the dough’s fermentation and rise.
Patience and Time: Remember, sourdough baking is as much about the process as the final product. Enjoy the rhythm of mixing, kneading, shaping, and baking as part of the rewarding experience of making sourdough sandwich bread.
With your ingredients and tools ready, you’re set to embark on the rewarding journey of sourdough bread making. The act of transforming simple ingredients into a beautiful, crusty loaf of bread is a deeply satisfying experience. Up next, we’ll walk through the step-by-step process of creating your very own sourdough sandwich bread, sharing tips and tricks to ensure success every step of the way.
Step-by-Step Recipe for Sourdough Sandwich Bread
Baking sourdough sandwich bread is a rewarding journey that transforms simple ingredients into a delightful culinary masterpiece. Let’s walk through the detailed process, from mixing to baking, ensuring you craft a perfect loaf every time.
Initial Mixing and Autolyse
Combine the Ingredients: Start by mixing your flour and water in a large bowl. Aim for a shaggy dough consistency. This initial mix, known as the autolyse process, allows the flour to fully hydrate and begins gluten development without the interference of salt and starter. Let this mixture sit for about 30 minutes to 1 hour.
Incorporating the Starter and Salt
Add the Starter: After the autolyse, add your ripe sourdough starter to the mixture. Use your hands or a dough scraper to fold the starter into the dough, ensuring even distribution.
Mix in the Salt: Sprinkle the salt over your dough and mix it in thoroughly. The salt not only enhances flavor but also tightens the gluten structure, contributing to the bread’s texture.
Bulk Fermentation
First Folds: Once your ingredients are fully incorporated, begin the bulk fermentation process. During the first 2 hours, perform stretch and folds every 30 minutes. This technique involves grabbing a portion of the dough, stretching it upwards, and folding it over itself. Rotate the bowl and repeat the process until all sides have been folded. This action strengthens the dough and incorporates air.
Let it Rise: After the initial folds, let the dough continue to ferment at room temperature until it roughly doubles in size and shows signs of airiness and strength. This process can take anywhere from 4 to 12 hours, depending on your kitchen’s temperature.
Shaping the Dough
Pre-Shape: Gently turn the dough out onto a lightly floured surface. Shape it into a round or oval, depending on your preferred loaf shape. Let it rest for about 20 minutes, covered, to relax the gluten.
Final Shape: Shape the dough into a tight ball or log, creating surface tension on the outside. This tension helps the loaf maintain its shape and contributes to a good rise in the oven.
Proofing: Place your shaped dough into a floured banneton basket or a bowl lined with a clean kitchen towel. Cover and let it proof for 1 to 2 hours at room temperature, or overnight in the refrigerator for a more developed flavor.
Scoring and Baking
Preheat Your Oven: Preheat your oven with a Dutch oven or baking stone inside to 450°F (232°C) at least 30 minutes before you plan to bake.
Scoring the Dough: Just before baking, gently turn your proofed dough onto a piece of parchment paper. Use a lame or sharp knife to make a few slashes across the top. This scoring controls how the bread expands in the oven.
Bake with Steam: Place your dough (on the parchment paper) into the preheated Dutch oven or on the baking stone. If using a stone, add a tray of boiling water below to create steam. Cover the Dutch oven or close the oven door quickly to trap the steam.
Bake: Bake for 20 minutes with the lid on (or with steam), then remove the lid and lower the oven temperature to 425°F (218°C). Continue baking for another 25-30 minutes until the crust is deeply golden and the loaf sounds hollow when tapped on the bottom.
Cool: Allow the bread to cool on a wire rack for at least an hour before slicing. Cutting into the bread too early can result in a gummy texture.
Congratulations! You’ve just baked a beautiful loaf of sourdough sandwich bread. Through mastering these steps, you’ve not only created a delicious bread but also connected with an ancient tradition of artisan baking. Enjoy the fruits of your labor, and remember, each loaf is a step forward in your sourdough journey.
Troubleshooting and FAQs for Sourdough Sandwich Bread
Baking sourdough bread is an adventure filled with learning and experimentation. Along the way, you might encounter some challenges. This section addresses common issues and provides solutions to ensure your sourdough sandwich bread turns out perfectly every time.
Dough Is Too Sticky or Too Dry
Too Sticky: If your dough feels excessively sticky, resist the temptation to add too much additional flour. Instead, wet your hands before handling the dough. Stickiness often indicates high hydration, which can lead to a wonderfully open crumb and light texture.
Too Dry: Conversely, if the dough is too dry and tough to work with, incorporate a small amount of water during the initial mixing. Do this gradually until you reach the desired consistency. Remember, the absorption rate can vary based on the type of flour used.
Bread Didn’t Rise
Inactive Starter: Ensure your sourdough starter is active and bubbly before you begin. An inactive starter might not have enough yeast activity to leaven the bread. Feeding your starter regularly keeps it vigorous.
Room Temperature: If your kitchen is too cold, the dough might rise very slowly. Find a warmer spot or slightly increase the dough’s temperature by using warmer water in your mix.
Bread Is Too Dense
Underproofed Dough: Allow more time for the dough to rise during the bulk fermentation and final proofing stages. Look for visual cues like size increase and surface bubbles.
Overworking the Dough: Over-kneading can lead to a tight, dense crumb. Develop the gluten gently through stretch and fold techniques without excessive handling.
Crust Is Too Thick or Hard
Steam Issue: Ensure adequate steam during the initial baking phase to allow the bread to expand freely before the crust sets. Using a covered Dutch oven or a steam tray can help.
Baking Time and Temperature: Adjust the oven temperature if the crust is too thick or hard. Baking at a slightly lower temperature for a longer time can result in a thinner, crisper crust.
Bread Is Gummy Inside
Underbaked: Ensure the bread is fully baked by checking its internal temperature with a thermometer—aim for 200°F (93°C) to 210°F (99°C).
Slicing Too Soon: Let the bread cool completely before slicing. The cooling process allows the crumb to set and the moisture to redistribute evenly.
FAQs
Can I Use All-Purpose Flour Instead of Bread Flour?
Yes, you can use all-purpose flour, but the bread might have a slightly different texture. Bread flour has a higher protein content, leading to stronger gluten development and a chewier crumb.
How Can I Make My Sourdough Bread More Sour?
To increase the sourness, extend the bulk fermentation time, use a higher proportion of whole grain flour in your starter, and consider a longer, cold proof in the refrigerator.
Why Does My Sourdough Bread Flatten Out?
This often happens when the dough is overproofed or lacks sufficient gluten development. Ensure your dough is strong and well-shaped before proofing, and be mindful not to let it overproof.
Can I Freeze Sourdough Bread?
Absolutely! Sourdough bread freezes well. Cool the loaf completely, slice it if desired, and freeze it in a sealed bag. Thaw at room temperature or toast slices directly from the freezer.
Variations and Serving Suggestions for Sourdough Sandwich Bread
Once you’ve mastered the basic sourdough sandwich bread recipe, the world of variations and creative serving suggestions opens up. Experimenting with different ingredients and flavors can transform your bread into a versatile component of any meal. Let’s explore how to customize your sourdough sandwich bread and serve it in delightful ways.
Bread Variations
Whole Grain Twist: Incorporate whole grain flours like whole wheat, rye, or spelt for added nutrition and a deeper flavor profile. Start with replacing 20-30% of the bread flour with whole grain flour and adjust based on your preferences.
Seeded Loaf: Mix in your favorite seeds—such as sunflower, sesame, flaxseed, or pumpkin seeds—into the dough for a crunchy texture and nutritional boost. Soaking the seeds overnight can prevent them from drawing moisture out of the dough.
Herb and Garlic Bread: Add chopped fresh herbs (like rosemary, thyme, or oregano) and minced garlic into the dough for a fragrant, flavorful loaf. This variation is perfect for making aromatic sandwiches or serving alongside soup.
Sweet Swirls: For a sweet twist, roll out the dough and spread a mixture of cinnamon, sugar, and softened butter before shaping. This creates a sweet, swirly pattern in every slice, making the bread a delightful breakfast treat.
Serving Suggestions
Classic Sandwiches: Use thick slices of sourdough sandwich bread to build hearty sandwiches. The bread’s tangy flavor elevates simple ingredients like ham, cheese, and fresh vegetables.
Grilled Cheese Perfection: Sourdough bread’s texture and taste make for an unparalleled grilled cheese experience. The crust crisps beautifully while the inside melts into gooey goodness.
Avocado Toast: Top a toasted slice of sourdough with smashed avocado, a sprinkle of salt, and a dash of chili flakes for a simple yet satisfying meal. For extra protein, add a poached or fried egg on top.
French Toast: Transform your sourdough sandwich bread into decadent French toast. The bread’s structure holds up well to soaking in the egg mixture, resulting in a custardy interior and crisp exterior after frying.
Soup and Stew Companion: Serve slices of warm sourdough bread alongside your favorite soups and stews. Its absorbent nature and robust flavor make it the perfect accompaniment for dipping and savoring the broth.
Croutons and Bread Crumbs: Don’t let stale sourdough go to waste. Cube it up and bake into crunchy croutons for salads, or pulse in a food processor to make flavorful bread crumbs for coating or topping dishes.
Exploring these variations and serving suggestions allows you to enjoy the fruits of your baking labor in numerous delicious ways. Sourdough sandwich bread is incredibly adaptable, fitting seamlessly into breakfast, lunch, dinner, and everything in between. As you continue to experiment with different flavors and uses, you’ll discover even more ways to make this bread a staple in your culinary repertoire.
Conclusion
Embarking on the journey of baking sourdough sandwich bread opens up a world of culinary creativity and satisfaction. From mixing and fermenting to baking and tasting, each step brings its own rewards. Whether you’re savoring the simple pleasure of a freshly baked loaf or experimenting with a variety of flavors and ingredients, sourdough bread is a testament to the beauty of artisan baking.
As you continue to explore the endless possibilities of sourdough baking, remember that each loaf is a reflection of your care, environment, and creativity. Don’t hesitate to dive into the variations and serving suggestions we’ve discussed, and always look for ways to share your baking adventures with others.
For more delicious recipes and baking tips, be sure to visit RecipesZap. Whether you’re a seasoned baker or just starting out, you’ll find inspiration, guidance, and a community of fellow food enthusiasts ready to celebrate your successes and help you navigate your baking journey.
Happy baking, and may your sourdough sandwich bread be a source of joy and pride in your kitchen!